Security Scan Setup
The earlier you find security vulnerabilities, the lower the cost to fix them. With KIWI's security scanning features, you can automatically detect vulnerabilities from the early stages of development and build secure services.
Why Do You Need Security Scanning?
The cost to fix vulnerabilities varies greatly depending on when they are discovered:
- During development: Fix cost is lowest. Just modify a few lines of code.
- During testing: Moderate cost. Feature rework may be required.
- In production: Highest cost. Emergency patch and data breach response needed.
KIWI naturally integrates security into the development pipeline following DevSecOps principles.
DevSecOps combines Development, Security, and Operations. It realizes "security from the start" rather than "security later."
Security Scan Types
KIWI provides three types of security scans:
- SAST (Static Application Security Testing): Analyzes source code. Runs before build and can discover SQL Injection, XSS, hardcoded passwords, etc.
- SCA (Software Composition Analysis): Analyzes open source libraries. Runs during build and checks for known CVE vulnerabilities and license violations.
- DAST (Dynamic Application Security Testing): Analyzes running applications. Runs after deployment and discovers auth bypass, missing security headers, CSRF, etc.
We recommend the order SAST → SCA → DAST. Automate SAST and SCA in the build pipeline, and run DAST after deploying to the staging environment.
Running a SAST Scan
SAST (Static Application Security Testing) analyzes source code without executing it to find vulnerabilities. It can discover SQL Injection, XSS, hardcoded passwords, and more.
Step 1: Run SAST from the Security Tab
Click the service in [Service Management] → Security tab → Click Run Scan button in the SAST section.
Step 2: Check Analysis Tools
KIWI uses the following tools to analyze code:
- CodeQL: Supports Java, JavaScript, Python, Go, C/C++. GitHub's static analysis tool with high accuracy.
- Semgrep: Supports almost all languages. Features fast scan speed and custom rules support.
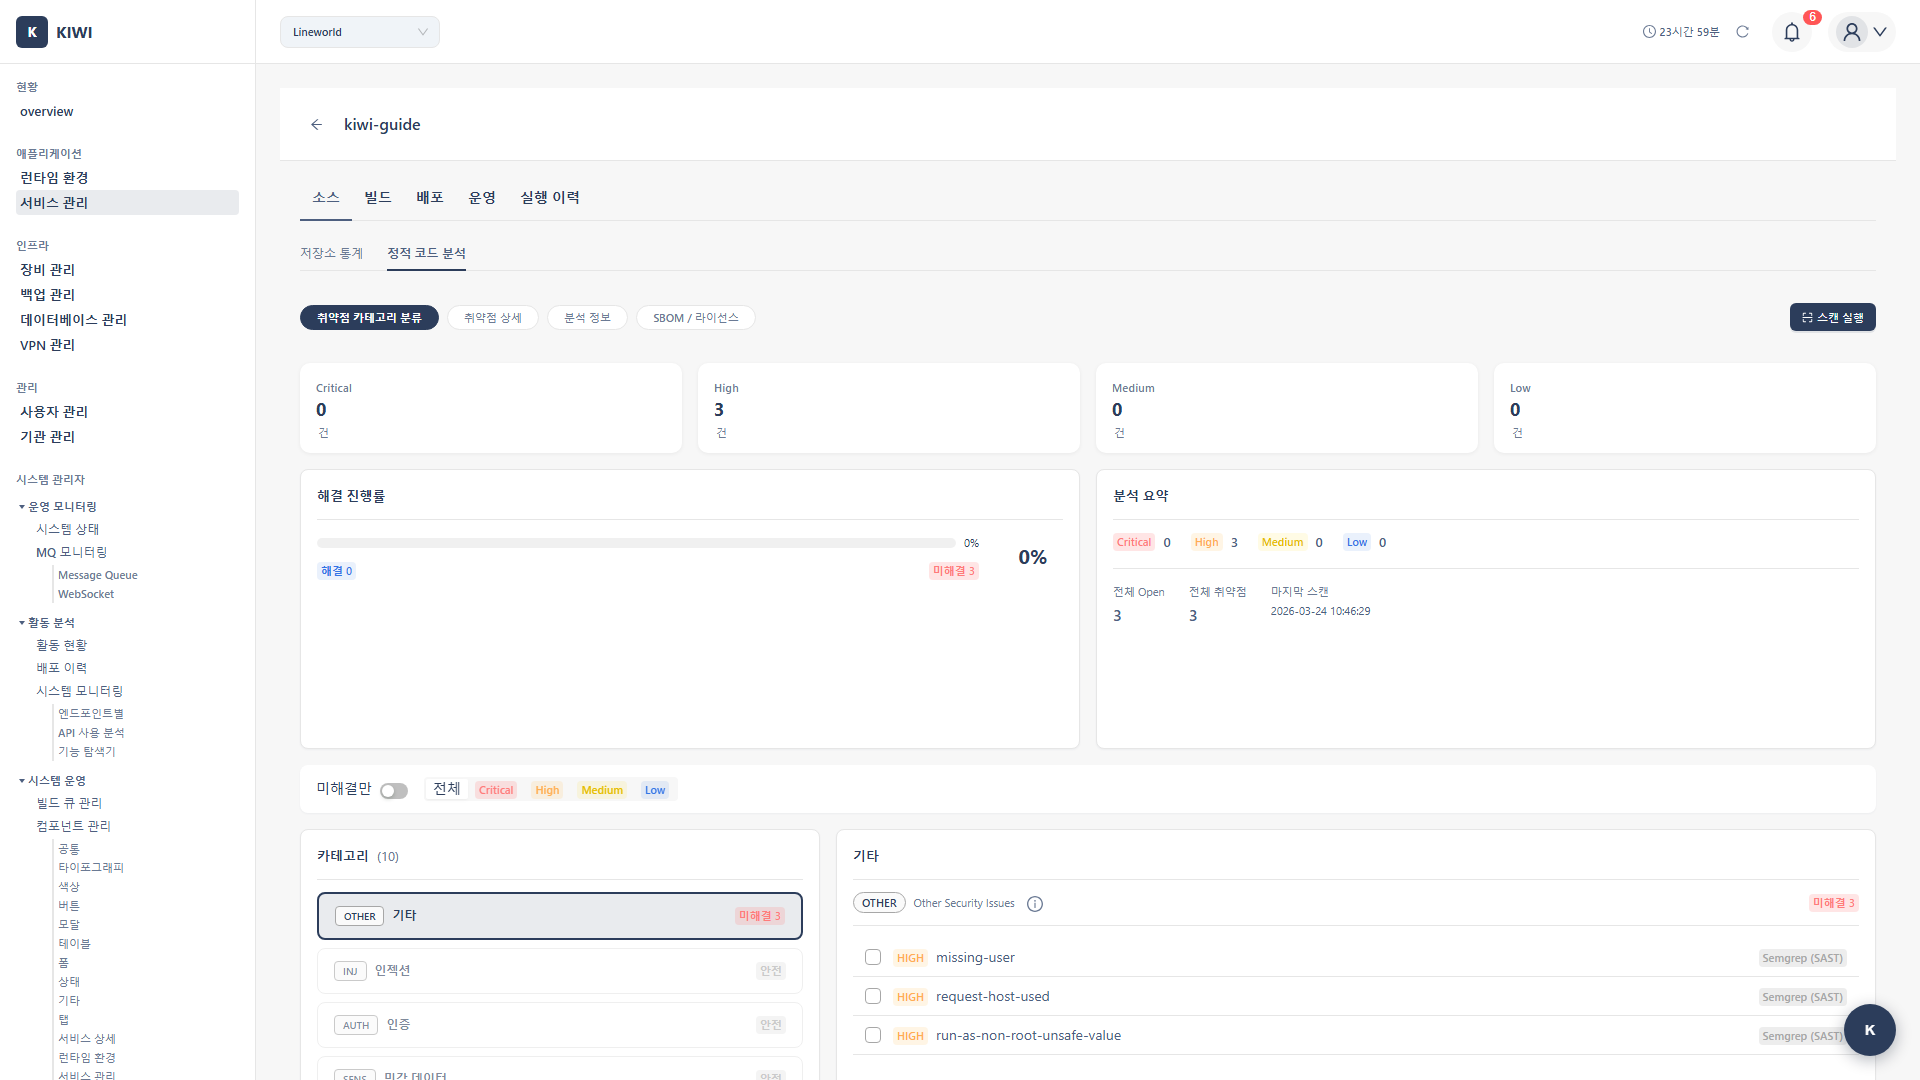
Step 3: Review Scan Results
When the scan completes, vulnerabilities are categorized by severity:
- Critical: Critical vulnerability that can be immediately exploited. Must fix immediately.
- High: High-risk vulnerability. Fix as soon as possible.
- Medium: Medium-risk vulnerability. Plan and address sequentially.
- Low: Low-risk vulnerability. Review and fix as needed.
Step 4: View Vulnerability Details
Click on a vulnerability entry to view detailed information:
- File path and line number: Exact location of the vulnerability .
- Detailed description: Cause and impact of the vulnerability .
- Remediation guide: How to fix the code .
- CWE reference: Standard vulnerability classification information .
- Auto-run on PR creation: Include SAST in your CI pipeline
- Set Critical/High as blockers: Block merge if severe vulnerabilities exist
- Update rules regularly: Detect new vulnerability patterns .
Running an SCA Scan
SCA (Software Composition Analysis) checks for known vulnerabilities (CVEs) in the open-source libraries used in your project. With supply chain attacks on the rise, SCA has become increasingly important.
Step 1: Run SCA from the Security Tab
Select the service in [Service Management] → Security tab → Click Run Scan button in the SCA section.
Step 2: Check Analysis Targets
SCA automatically finds and analyzes dependency files in your project:
- Node.js:
package.json,package-lock.json,yarn.lock - Python:
requirements.txt,Pipfile,poetry.lock - Java:
pom.xml,build.gradle - Go:
go.mod,go.sum
Step 3: Review Vulnerability Results
Check the list of vulnerable dependencies in the scan results:
- Package name: Library where vulnerability was found.
- Current version: Version installed in your project.
- Fixed version: Minimum version that resolves the vulnerability.
- CVE ID: Public vulnerability identifier.
- CVSS score: Risk score. (0-10, higher = more dangerous)
- CVE (Common Vulnerabilities and Exposures): Unique identifier for publicly known security vulnerabilities. (e.g., CVE-2021-44228)
- CVSS (Common Vulnerability Scoring System): Represents vulnerability severity as a 0-10 score. 9.0 or above is Critical.
Step 4: Apply VEX Filter (Optional)
Even if a vulnerability is found, you may not be affected if you don't actually use that code path. Enabling the VEX filter can exclude such vulnerabilities.
- Major version updates (1.x → 2.x): Breaking changes may exist, testing required .
- Security patch versions (1.0.0 → 1.0.1): Usually safe to update .
- Check dependency conflicts: Verify version compatibility with other libraries .
Generating an SBOM
SBOM (Software Bill of Materials) is a list of all components included in your software. Like a food ingredient list, it transparently shows what libraries are used in your service.
- Regulatory compliance: SBOM submission required for US federal government contracts (Executive Order 14028)
- Vulnerability response: Quickly identify affected services when new vulnerabilities are discovered .
- License management: Verify open source license obligations .
Step 1: Select SBOM Type
In [Service Management] → Select service → Security tab, click Generate SBOM.
- Source SBOM: Analyzes dependency files in source code. Generated before build.
- Image SBOM: Analyzes built container image. Generated after build, reflecting actual deployment.
Step 2: Select Format and Download
- CycloneDX: Suitable for security analysis and compliance. Optimized for security vulnerability information.
- SPDX: Suitable for license compliance. Industry standard with wide tool support.
Running a DAST Scan
DAST (Dynamic Application Security Testing) simulates real attacks against a running application to find vulnerabilities. It can find runtime vulnerabilities that SAST/SCA cannot detect.
DAST simulates real attacks. Only run on test/staging environments. Running on production environments can cause service outages or data corruption.
Step 1: Configure DAST Settings
In [Service Management] → Select service → Security tab → Click Settings in the DAST section.
- Target URL: Web application URL to scan. (e.g.,
https://staging.company.com) - Authentication settings: If login is required, set username/password or token.
- Scan scope: Scan specific paths only. (e.g.,
/api/*,/admin/*)
Step 2: Run DAST Scan
Click the Run Scan button. DAST checks for the following vulnerabilities:
- SQL Injection: Checks for malicious SQL query injection.
- XSS: Checks for malicious script injection.
- CSRF: Checks if requests using stolen user privileges are possible.
- Missing security headers: Checks if security headers like CSP, X-Frame-Options are set.
- Auth/authz vulnerabilities: Checks for session management and permission verification issues.
Step 3: Review Results and Take Action
Check the following information in DAST results:
- Vulnerable URL: Endpoint where attack succeeded .
- Reproduction steps: Example request to verify the vulnerability .
- Remediation guide: How to fix code or configuration .
- Auto-run after staging deployment: Include in CI/CD pipeline
- Use authenticated scans: Also scan pages only accessible after login
- Regular scheduled scans: Recommended weekly or more frequent .
Frequently Asked Questions
SAST scan is taking too long
Causes and solutions:
- Large repository size: Exclude unnecessary directories (node_modules, vendor, etc.).
- Full file scanning: Use incremental scan option to only scan changed files.
- All rules enabled: Select only rules needed for your project.
There are too many false positives
Ways to reduce false positives:
- Enable VEX filter: Exclude code paths not actually used .
- Rule exceptions: Disable specific rules in service settings .
- Inline comments: Exclude specific lines with comments like
// nosec
Always record the reason for the exception. You need to be able to explain why it was excepted during audits.
I want to ignore a specific vulnerability
Click the Exception button on the vulnerability detail screen. Enter the following information:
- Exception reason: Why this vulnerability has no impact in the current environment .
- Expiration date: Validity period of the exception (regular review recommended)
- Responsible person: Decision maker for the exception .
I want to export scan results as a report
Click the Export Report button in the Security tab to download in the following formats:
- PDF: For executive reports, audit submissions .
- CSV: For spreadsheet analysis .
- JSON: For integration with other tools .
Related Guides
- Build/Deploy - Integrate security scans into build pipeline
- Dashboard Usage - Security status monitoring .