Backup Management
Path: /backup
Unexpected failures or data loss can occur at any time during service operation. The [Backup Management] page allows you to easily manage backups and recovery for Kubernetes etcd and Docker/Podman containers, enabling quick system recovery in case of emergencies.
If you cannot access this page, please request permission from your organization administrator.
Why Do You Need Backups?
Backups protect your services in the following situations:
- System Failure Recovery: Quickly restore to a previous state after server failures, disk corruption, etc.
- Undo Incorrect Changes: Recover accidentally deleted configurations or data
- Migration Support: Transfer data when moving to a new environment.
- Audit and Compliance: Preserve system state at specific points in time to meet audit requirements.
Follow the 3-2-1 rule: Keep at least 3 backup copies on 2 different types of media, with 1 stored at a remote location. KIWI's external storage integration makes this easy.
Supported Backup Types
KIWI supports backups for various runtime environments:
- etcd Backup: Targets Kubernetes Cluster. Backs up all cluster state (Pods, Services, ConfigMaps, Secrets, etc.). Recommended for preserving entire K8s environment state.
- Docker Backup: Targets Docker Host. Backs up containers, volumes, and images. Recommended for protecting Docker-based services.
- Podman Backup: Targets Podman Host. Backs up containers, volumes, and images. Recommended for protecting Podman-based services.
etcd can be thought of as the "brain" of Kubernetes. It's a distributed key-value store that holds all configuration and state information for the cluster, from Pod placement to Secrets. Backing up etcd allows you to restore the entire cluster.
Exploring the UI Layout
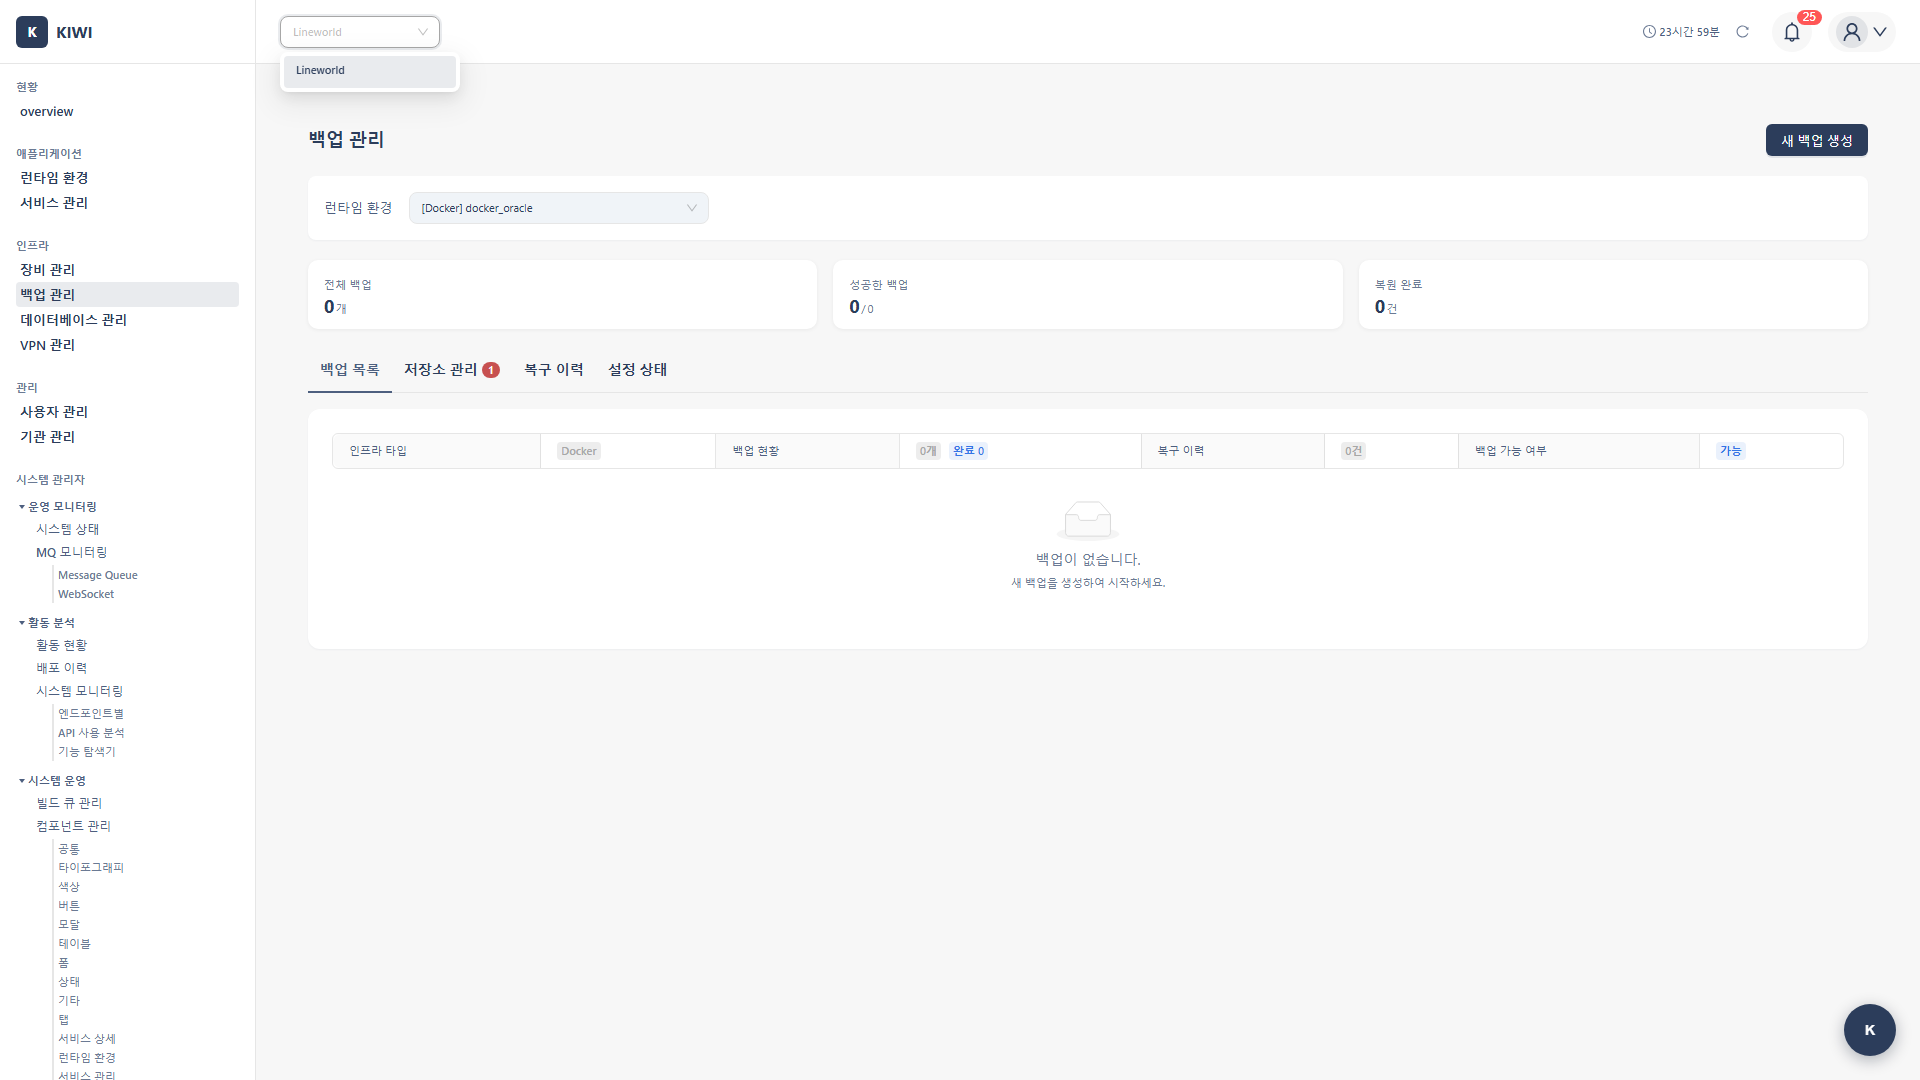
The Backup Management page consists of five tabs:
- Backup Status: Overview. Check installation status, configure schedules, and run setup wizard.
- Backup List: Backup management. Create, view, delete backups, and execute restores.
- Restore History: Recovery records. View past restore operation results.
- Storage Settings: Storage management. Connect external storage (S3, MinIO).
- Backup Browser: File exploration. Browse and download backup files directly.
Information Available in the Backup List
Each backup item displays the following information:
- Name: Unique name identifying the backup.
- Type: etcd, Docker, or Podman.
- File Size: Size of the backup file.
- Creation Time: Date and time when the backup was created.
- Status: Success, Failed, or In Progress.
For each backup, you can perform Restore, Delete, and Download actions.
Getting Started: Backup Setup Wizard
If this is your first time using the backup feature, the setup wizard will guide you step by step.
How to Run the Setup Wizard
- Navigate to the [Backup Management] page from the left menu.
- The setup wizard appears automatically on first access.
- If you've already completed setup, click the Start Setup Wizard button in the Backup Status tab.
- Select Backup Target: Choose the environment to back up.
- For Kubernetes environments, select etcd
- For Docker/Podman environments, select the corresponding option.
- Configure Storage: Choose where to store backup files.
- Local: Store on server disk. Advantages: Fast backup/restore speed. Considerations: Risk of backup loss if server fails.
- MinIO: On-premises object storage. Advantages: S3-compatible within local network. Considerations: Requires separate MinIO server.
- S3: AWS S3 or compatible storage. Advantages: High durability, remote storage. Considerations: Requires network bandwidth.
- Schedule Settings (optional): Set up automatic backup frequency.
- Click Finish to complete the setup.
For production environments, we recommend setting up external storage + automatic scheduling together. Even if there's a problem with the local server, you can recover backups from the remote storage.
Creating a Kubernetes etcd Backup
etcd backup saves the entire state of your Kubernetes cluster as a snapshot. You can safely perform backups while the cluster is running.
Step-by-Step Guide
- Select the Backup List tab on the Backup Management page.
- Click the Create Backup button in the upper right.
- When the backup creation modal appears, enter the following information:
- Type: Select etcd. Example: etcd.
- Target Cluster: K8s cluster to back up. Example: production-cluster.
- Backup Name: Easy-to-identify name. Example: etcd-backup-20240315.
- Click the Start Backup button.
- The backup is complete when the status changes to Success in the backup list.
etcd backups are performed online, so cluster services are not interrupted. You can safely back up during operation.
Creating Docker/Podman Backups
In Docker or Podman environments, you can selectively back up containers, volumes, and images.
Step-by-Step Guide (Docker)
- Select the Backup List tab on the Backup Management page.
- Click the Create Backup button.
- In the backup creation modal, configure the following:

- Type: Select Docker.
- Target Host: Select the Docker host to back up.
- Backup Targets: Choose from containers, volumes, images.
- Click the Start Backup button.
Step-by-Step Guide (Podman)
Podman backup follows the same process as Docker.
Backup Target Selection Guide
- Containers: State of running containers. Select when you need to restore container configuration and state.
- Volumes: Persistent data volumes. Select when data preservation is critical (databases, files).
- Images: Container images. Select when you want to preserve specific image versions.
In most cases, volumes are the most important. Containers and images can be recreated, but data stored in volumes cannot be recovered without backups.
Connecting External Storage
To store backups more securely, connect external storage. You can recover from remote storage even if there's a problem with the local server.
Supported Storage
- MinIO: S3-compatible open-source object storage. Suitable for on-premises and private cloud environments.
- AWS S3: Amazon's cloud storage. Suitable for public cloud and hybrid environments.
- S3-Compatible: Other storage supporting S3 API. Suitable for various environments.
Connection Setup Steps
- Select the Storage Settings tab.
- Click the Add Storage button.
- Select the storage type and enter connection information:
MinIO Settings:
- Endpoint: MinIO server address. Example: https://minio.example.com.
- Access Key: Access key. Example: minio-access-key.
- Secret Key: Secret key. Example: minio-secret-key.
- Bucket Name: Storage bucket. Example: kiwi-backups.
AWS S3 Settings:
- Region: AWS region. Example: us-east-1.
- Access Key: AWS access key. Example: AKIA...
- Secret Key: AWS secret key. Example: (secret value).
- Bucket Name: S3 bucket. Example: my-backup-bucket.
- Click the Test Connection button to verify the settings are correct.
- If the test succeeds, click the Save button.
MinIO is an open-source object storage that is 100% compatible with the S3 API. It allows you to store backups the same way as AWS S3 in on-premises environments, enabling secure backup storage without cloud dependency.
Storage credentials (Access Key, Secret Key) are stored encrypted within KIWI. However, following the principle of least privilege, we recommend creating a dedicated user account for backups.
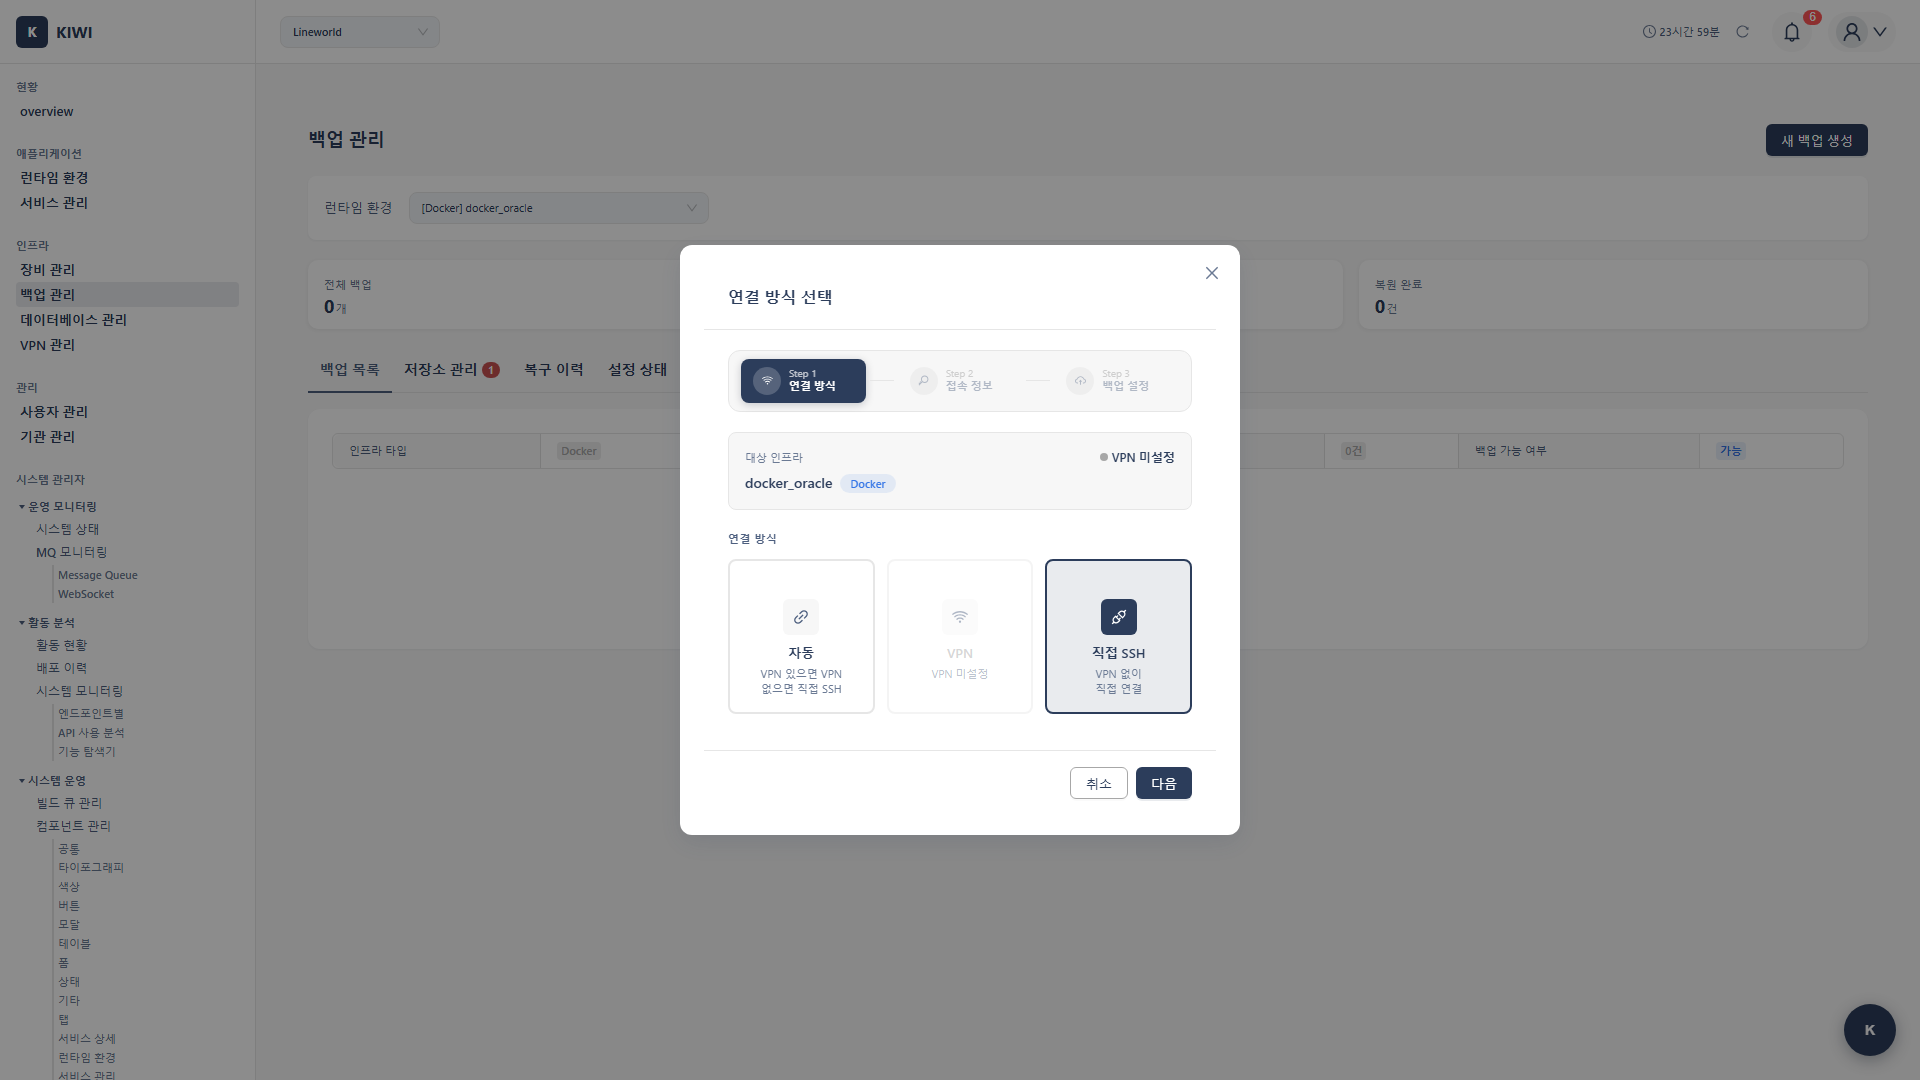
Restoring from a Backup
When problems occur, you can restore your system from a previous backup.
Pre-Restore Checklist
Check the following before starting a restore:
- Verify the backup is from the correct point in time
- Create a backup of the current state first (to revert if needed after restore)
- Communicate with the team if service interruption is required during restore
- Have the administrator password ready
Restore Steps
- Find the backup to restore in the Backup List tab.
- Click the Restore button for that backup.
- Review what will be restored in the restore preview screen.
K8s (etcd) Restore Screen:
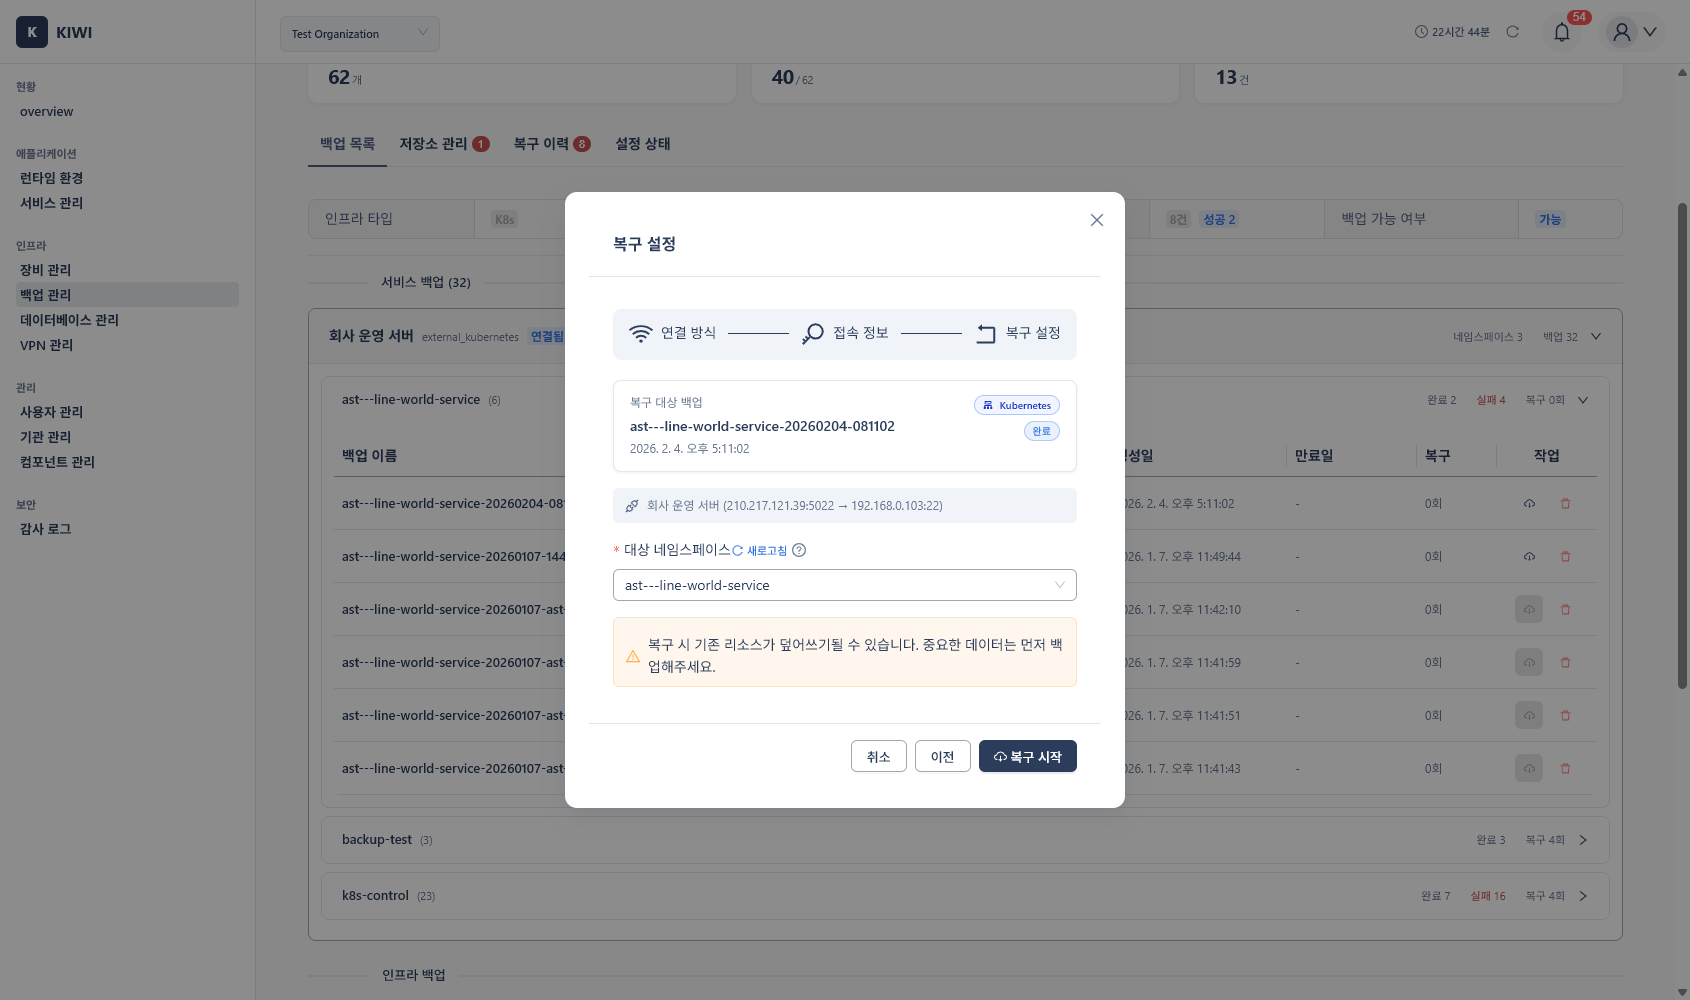
Docker/Podman Restore Screen:
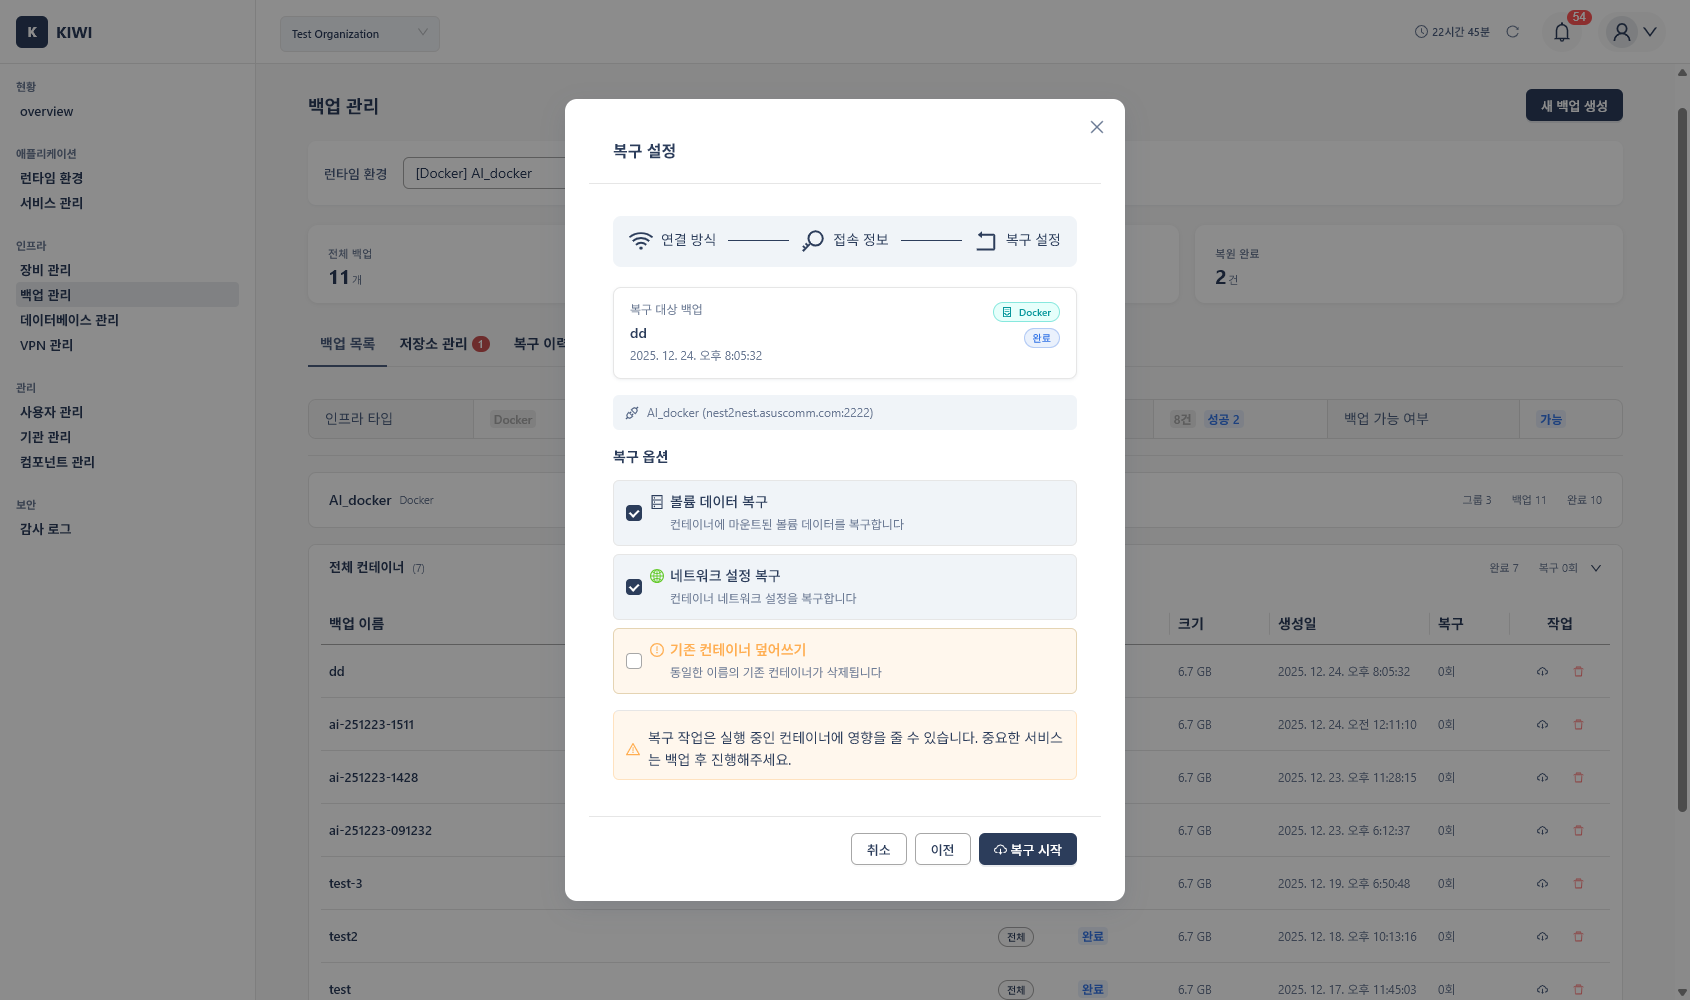
- Read and acknowledge the warnings carefully.
- Click the Start Restore button.
- Enter the administrator password for security verification.
- Wait for the restore to complete.
- After restore completes, verify the system is functioning normally.
The restore operation overwrites current data. Be sure to back up the current state before restoring. If problems occur after restore, you can revert using the backup you just created.
Setting Up Automatic Backup Schedules
Manual backups are easy to forget. Set up automatic schedules to ensure backups are created regularly.
Schedule Configuration Steps
- Select the Backup Status tab.
- Click the Schedule Settings button.
- Configure the backup frequency:
- Frequency: Options include Daily, Weekly, Monthly. Recommended: Production: Daily / Development: Weekly.
- Execution Time: Desired time. Recommended: Early morning hours with low traffic.
- Retention Policy: Number of backups to keep or retention period. Recommended: Minimum 7 days or 7 copies.
- Click the Save button.
Recommended Retention Policies
- Production: Backup Frequency: Daily, Retention Period: 30 days. Reason: Issues may take time to discover.
- Staging: Backup Frequency: Weekly, Retention Period: 14 days. Reason: For testing before production deployment.
- Development: Backup Frequency: Weekly, Retention Period: 7 days. Reason: Only basic protection needed.
Setting a retention policy automatically deletes old backups, saving storage space. However, be careful not to set it too short, as you may not have backups when you need them.
Quick Reference: Feature Access Methods
- Run Setup Wizard: Backup Status tab > Start Setup Wizard.
- Create etcd Backup: Backup List tab > Create Backup > Type: etcd.
- Create Docker/Podman Backup: Backup List tab > Create Backup > Type: Docker/Podman.
- Connect External Storage: Storage Settings tab > Add Storage.
- Restore Backup: Backup List tab > Restore button for target backup.
- Delete Backup: Backup List tab > Delete button (trash icon) for target backup.
- Configure Schedule: Backup Status tab > Schedule Settings.
Glossary
If you encounter unfamiliar terms, refer to the explanations below:
- etcd: A distributed key-value store that holds all state data for Kubernetes clusters. Acts as the cluster's "memory".
- Snapshot: A capture of data state exactly as it was at a specific moment. Like taking a photograph to preserve that instant.
- Object Storage: A storage system that stores files as objects. S3 and MinIO are representative examples.
- Bucket: The top-level container for files in object storage. Similar concept to a folder.
- Access Key / Secret Key: Authentication credentials for accessing object storage. Similar to ID/password.
Notes and Best Practices
Backup Considerations
- Regular Backup Testing: Perform actual restore tests at least quarterly to verify backups are working correctly.
- Use Multiple Storage Locations: Using both local and external storage together is more secure.
- Set Up Backup Notifications: Configure alerts to be notified of backup failures.
- Back Up Current State Before Restore: Restore operations cannot be undone, so back up the current state first.
- Large Backup Considerations: Large backups may affect network bandwidth, so perform them during low-traffic hours.
- Credential Management: External storage credentials are stored encrypted, but regular key rotation is recommended.