VPN Settings
This guide explains how to manage VPN profiles in KIWI and securely access remote infrastructure.
Why Do You Need VPN?
VPN (Virtual Private Network) is a technology for securely accessing your internal network from remote locations.
- Remote work: Without VPN, you cannot access internal systems. With VPN, you can access the internal network from anywhere.
- Data transfer: Without VPN, data is transmitted in plain text with risk of interception. With VPN, data is securely transmitted through an encrypted tunnel.
- IP whitelisting: Without VPN, you must add firewall rules for each IP. With VPN, you just allow the VPN IP.
- Cluster access: Without VPN, you must expose the API to the public internet. With VPN, you access only through the internal network.
A VPN tunnel creates an encrypted "virtual private line" over the internet. All traffic is encrypted in transit, so even if intercepted, the contents cannot be read.
Supported VPN Types
KIWI supports the following VPN types:
- WireGuard: A lightweight protocol with fast speed and simple setup. Recommended for new environments or when speed matters.
- OpenVPN: Provides high compatibility and various configuration options. Suitable when existing OpenVPN infrastructure exists.
- IPSec: An enterprise standard protocol with strong security. Recommended for enterprise networks and compliance requirements.
For new environments, we recommend WireGuard. It's faster than OpenVPN, simpler to configure, and works well on mobile devices.
Creating a VPN Profile
How to set up a VPN for accessing remote infrastructure.
Permission Notice: If you cannot access this feature, please request permission from your organization manager.
Step 1: Navigate to the VPN Management Page
Click [VPN Management] in the left menu.
Step 2: Add a New VPN Profile
Click the Add Profile button. The VPN profile settings modal opens.
Step 3: Select the VPN Type
Select the VPN type to use:
- WireGuard: Advantages include fast speed and simple setup.
- OpenVPN: Provides high compatibility and various configuration options.
- IPSec: Provides strong security as an enterprise standard protocol.
Step 4: Enter Basic Information
Enter the basic information for the VPN profile:
- Profile name: A name to identify the profile. (e.g.,
datacenter-vpn) - Description: A description of the profile. (e.g.,
VPN for data center access) - Server address: IP or domain of the VPN server. (e.g.,
vpn.company.com) - Port: VPN port. (e.g., WireGuard default is
51820)
Step 5: Configure Authentication Credentials
Configure authentication credentials according to the VPN type.
WireGuard settings:
- Private Key: Client private key.
- Public Key: Server public key.
- Preshared Key: Pre-shared key. (Optional, for additional security)
OpenVPN settings:
- Certificate: Client certificate file.
- Key file: Private key file.
- CA certificate: CA certificate file.
Step 6: Configure Network Settings
Enter the VPN network settings:
- Internal IP: The IP to be assigned within the VPN. (e.g.,
10.0.0.2/24) - Allowed IPs: Networks to route through the VPN. (e.g.,
10.0.0.0/8, 192.168.0.0/16) - DNS: DNS server to use in the VPN. (e.g.,
10.0.0.1)
Step 7: Save and Test
Click the Save button. Use the Test Connection button to verify the connection is working.
Activating a VPN Connection
How to connect using a configured VPN profile.
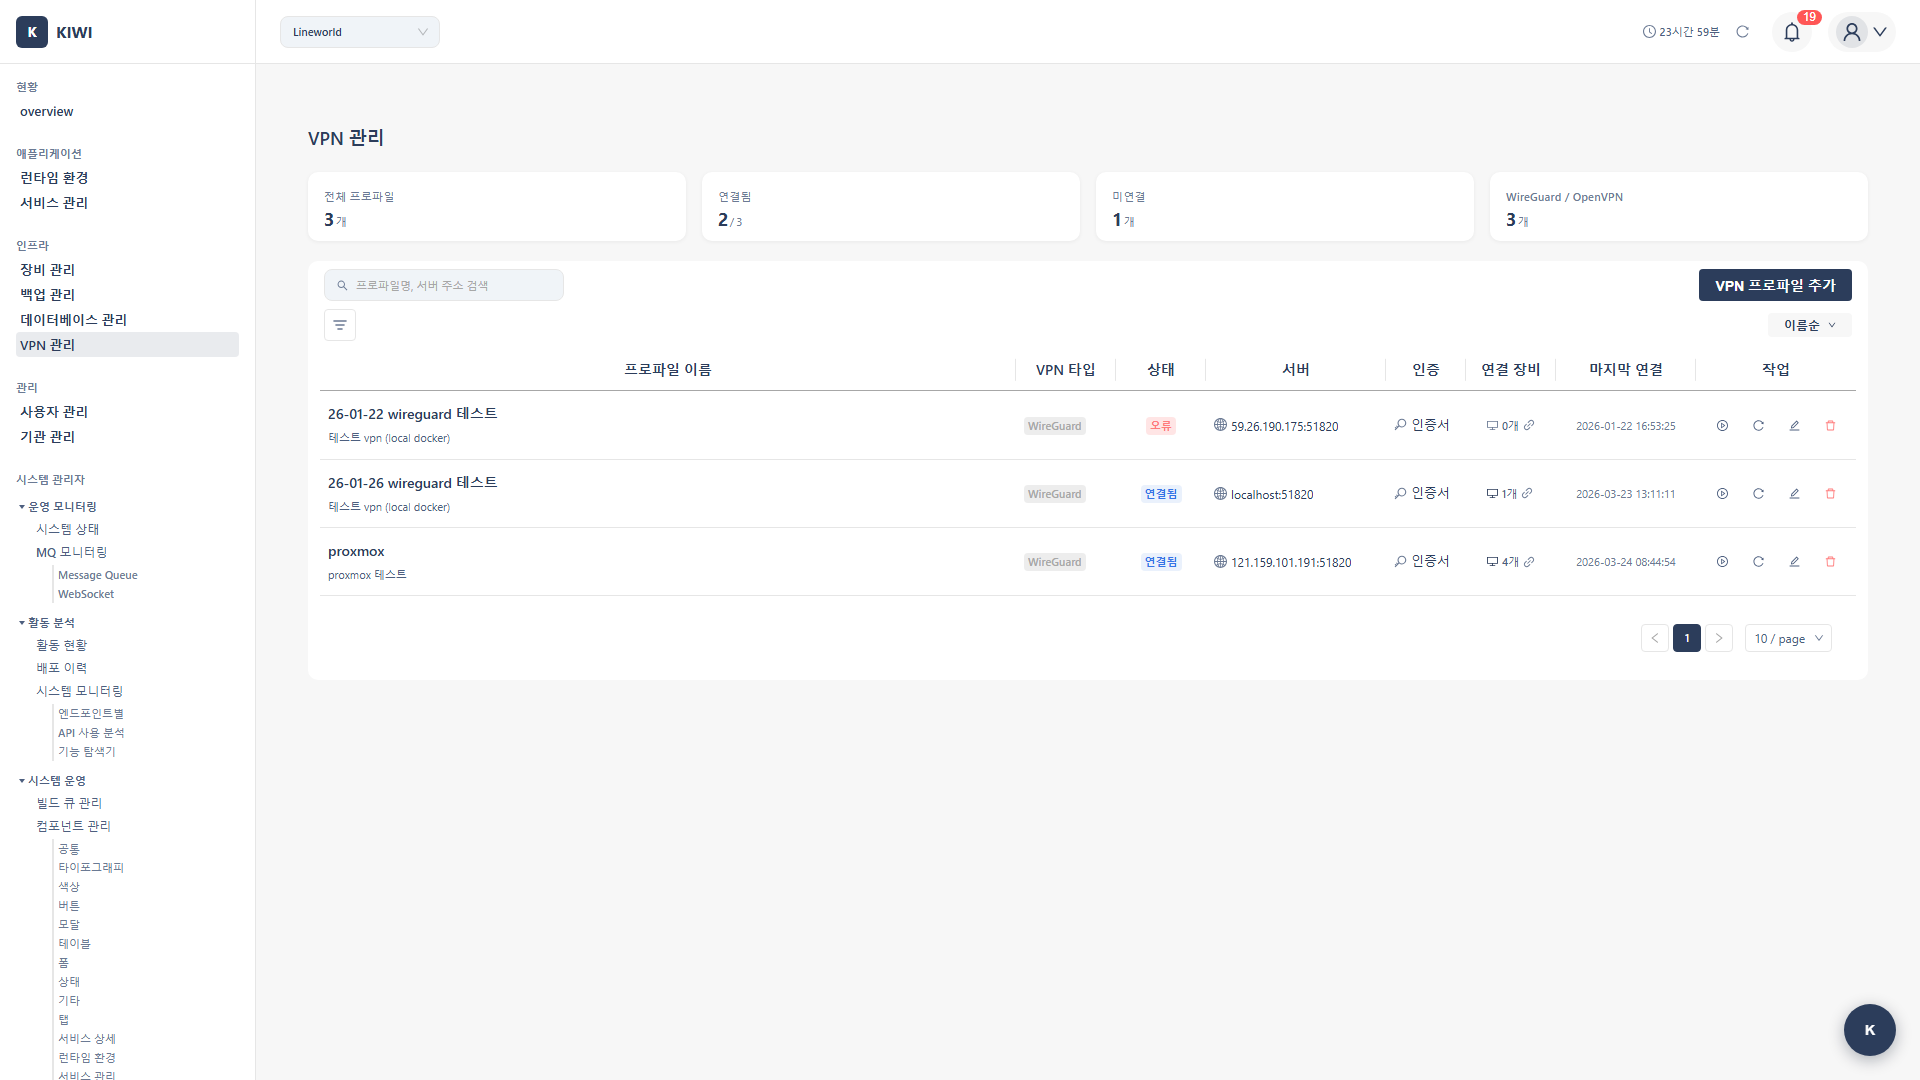
Step 1: Select a VPN Profile
Select the VPN profile to connect to from the profile list on the [VPN Management] page.
Step 2: Start Connection
Click the Connect button.
Step 3: Check Connection Status
Check the connection status:
- Connected: VPN is active and available.
- Connecting: Attempting to connect.
- Disconnected: VPN is inactive.
- Error: Connection failed. Check the settings.
Step 4: View Connection Information
When the connection is established, you can view the following information:
- Assigned internal IP
- Data transfer volume
- Connection time
- Handshake status
Configuring Infrastructure Access via VPN
How to register a cluster that is only accessible through VPN.
Prerequisite: A VPN profile must be configured and available for connection.
Step 1: Activate VPN Connection
Connect to the VPN that provides access to the target network.
Step 2: Navigate to the Runtime Environment Page
Click [Runtime Environment] in the left menu.
Step 3: Import External Runtime
Click the Import External Runtime button.
Step 4: Select VPN Connection
Select the VPN profile to use from the VPN selection dropdown. This is only selectable when the VPN is connected.
Step 5: Enter Cluster Connection Information
Enter the cluster connection information using the internal network address within the VPN. (e.g., 192.168.1.100:6443)
Step 6: Test Connection and Save
Test the cluster connection through the VPN. Save when the connection is successful.
Exporting/Importing VPN Profiles
How to share VPN settings with other users.
Step 1: Select the Profile to Export
Click the VPN profile to share on the [VPN Management] page.
Step 2: Export the Profile
Click the Export button and select the format:
- WireGuard Config: A format that can be used with the WireGuard client app.
- OpenVPN Config: A format that can be used with the OpenVPN client.
- QR Code: Scan with a mobile app for quick setup.
Step 3: Import Profile (Other Users)
Click the Import button and upload the configuration file.
VPN Connection Monitoring
How to monitor VPN connection status.
Step 1: Navigate to the Monitoring Tab
Click the Monitoring tab on the [VPN Management] page.
Step 2: Check Connection Status
Review the monitoring information:
- Active connections: Current number of connected VPNs.
- Traffic status: Volume of sent and received data.
- Connection history: Record of connections and disconnections.
- Error log: Record of connection failures.
Step 3: Configure Notifications (Optional)
Set up notifications for specific events:
- Connection lost: Receive a notification when the VPN connection is dropped.
- Connection failure: Receive a notification when a connection attempt fails.
- Certificate expiry: Receive a notification when a certificate is about to expire.
Deleting a VPN Profile
How to delete a VPN profile that is no longer in use.
Step 1: Select the Profile to Delete
Click the VPN profile to delete on the [VPN Management] page.
Step 2: Confirm Disconnection
If the profile is connected, disconnect it first.
Step 3: Delete the Profile
Click the Delete button. Click Delete in the confirmation dialog.
Step 4: Check Related Resources
Check if any runtime environments are using this VPN. The connection of related runtimes may fail.
Frequently Asked Questions
VPN connection is failing
Causes and solutions:
- Server address error: Verify the IP or domain is correct.
- Port blocked: Allow VPN port in firewall. (WireGuard: 51820, OpenVPN: 1194)
- Authentication error: Verify Private Key, Certificate, etc. are correct.
- Server down: Check if the VPN server is running.
VPN connection keeps dropping
- Keep-alive setting: For WireGuard, set
PersistentKeepalive = 25 - Network changes: Reconnection needed when switching between WiFi and mobile.
- NAT timeout: Check router NAT session timeout
Cannot access the cluster through VPN
- Allowed IP range: Is the cluster network (e.g.,
10.0.0.0/8) included in Allowed IPs? - Routing settings: Is routing to the cluster network configured on the VPN server?
- DNS resolution: Are internal cluster domains resolving? (Check VPN DNS settings)
Speed is slow
- Adjust MTU: Try a lower MTU (1280-1400) than the default
- Change VPN type: WireGuard is generally 30-50% faster than OpenVPN
- Server location: Use a VPN server in a nearby region.
Related Guides
- Runtime Environment Registration - Registering a cluster via VPN
- Device Management - SSH tunnel setup