Audit Log
This guide explains how to view and analyze system audit logs in KIWI.
Why Do You Need Audit Logs?
Audit logs are records of all activities that occur in the system. They are essential for security audits, troubleshooting, and regulatory compliance.
- Security breach: Without audit logs, it's unknown who did what. With audit logs, you can identify intrusion path and impact.
- Troubleshooting: Without audit logs, you rely on guesswork. With audit logs, you can track exact change history.
- Regulatory audit: Without audit logs, there's no evidence. With audit logs, you can pass audits with complete activity records.
- Detecting misuse: Without audit logs, you cannot detect issues. With audit logs, you can detect abnormal activity patterns.
Many security regulations (ISO 27001, SOC 2, GDPR, etc.) require maintaining audit logs. A proper log retention policy is key to compliance.
Audit Log Types
KIWI records the following types of activity:
- Authentication: Records login/logout and auth success/failure. Used to detect brute force attacks.
- Permission: Records permission grants/revocations and role changes. Used to monitor privilege escalation attempts.
- Resource: Records service/cluster creation/modification/deletion. Used to track configuration changes.
- Deployment: Records build starts and deployment completions/failures. Used to manage deployment history.
- System: Records configuration changes and backup executions. Used to audit system changes.
Viewing Audit Logs
How to review the activity records generated in the system.
Permission Notice: If you cannot access this feature, please request permission from your organization manager.
Step 1: Navigate to the Audit Log Page
Click [Audit Log] in the left menu.
Step 2: Review the Default Log List
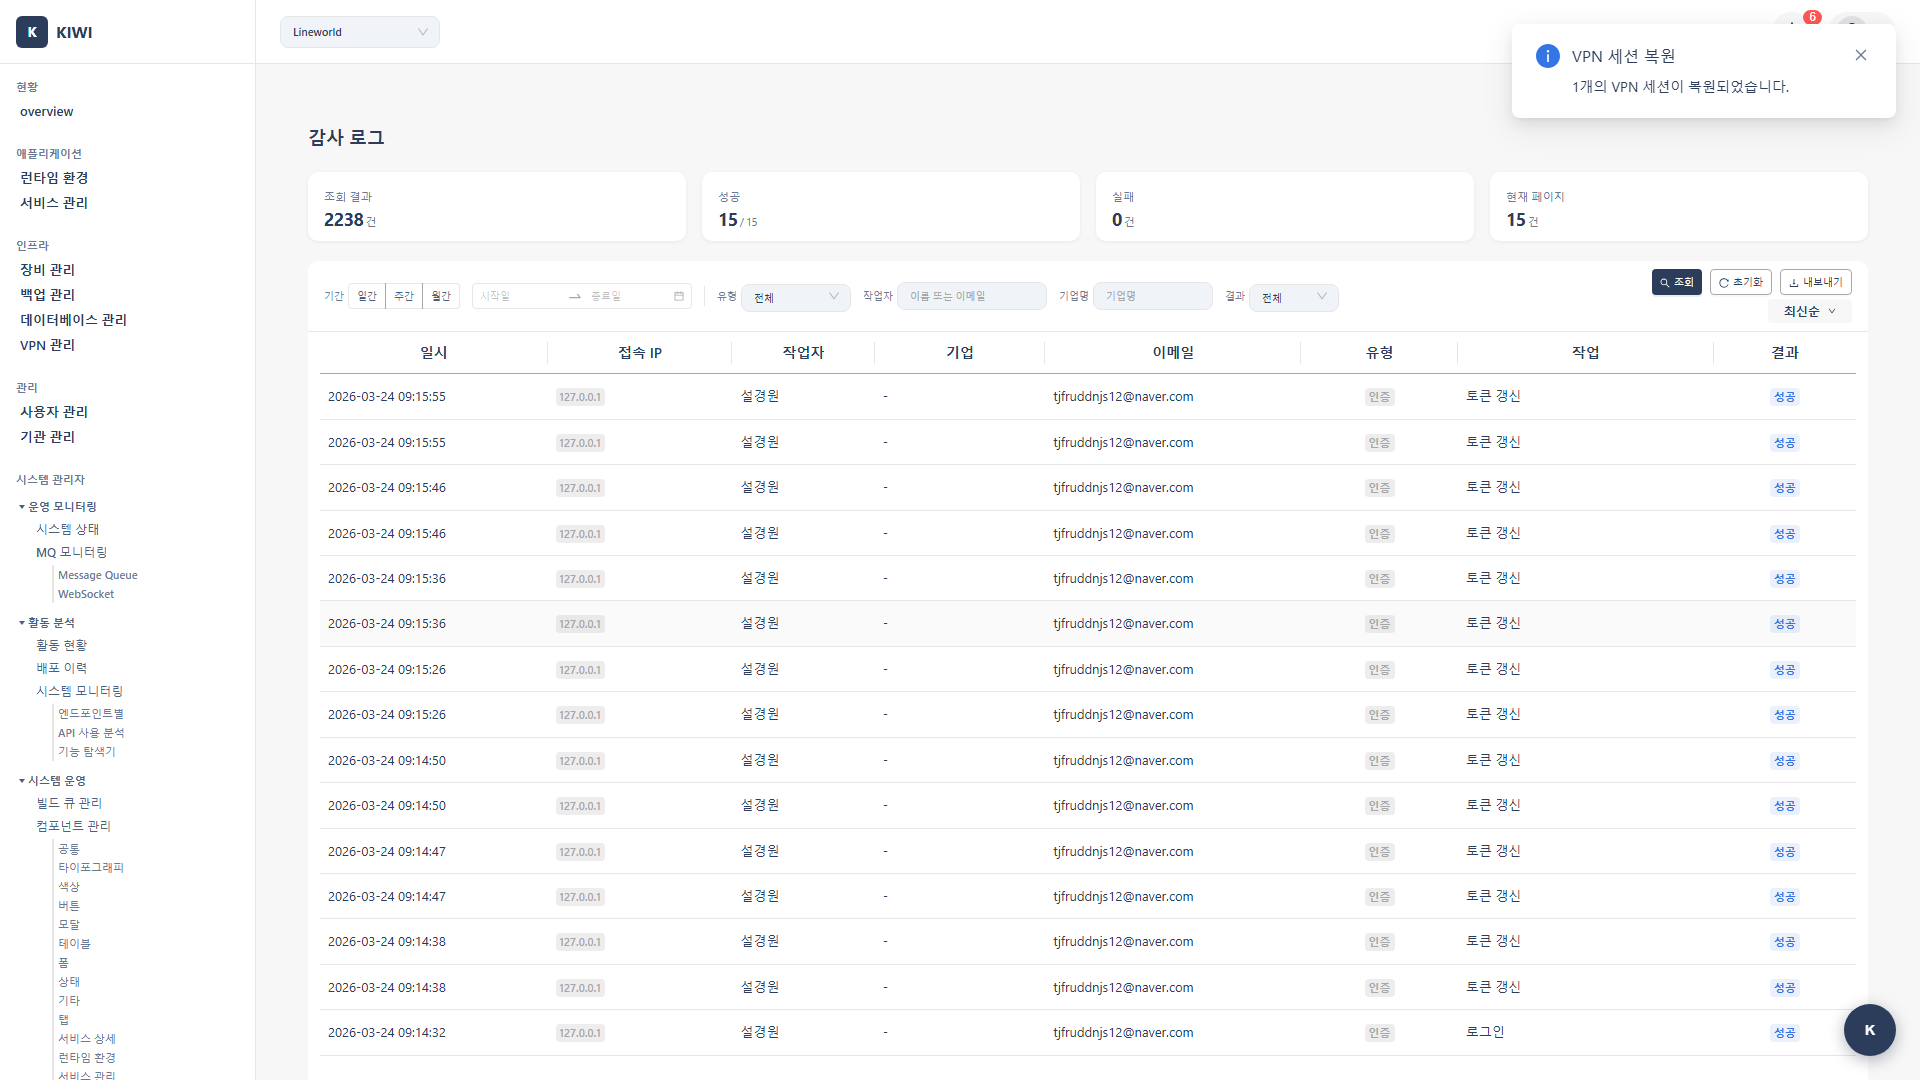
Review the list of recent logs in the audit log table. Each log displays the following information:
- Time: The time the event occurred.
- User: The user who performed the action.
- Type: The event type. (Authentication, Permission, Resource, Deployment, System)
- Action: The action performed. (Create, Modify, Delete, etc.)
- Target: The target resource of the action.
- Result: Success or failure.
Step 3: View Log Details
Click a log entry to view detailed information:
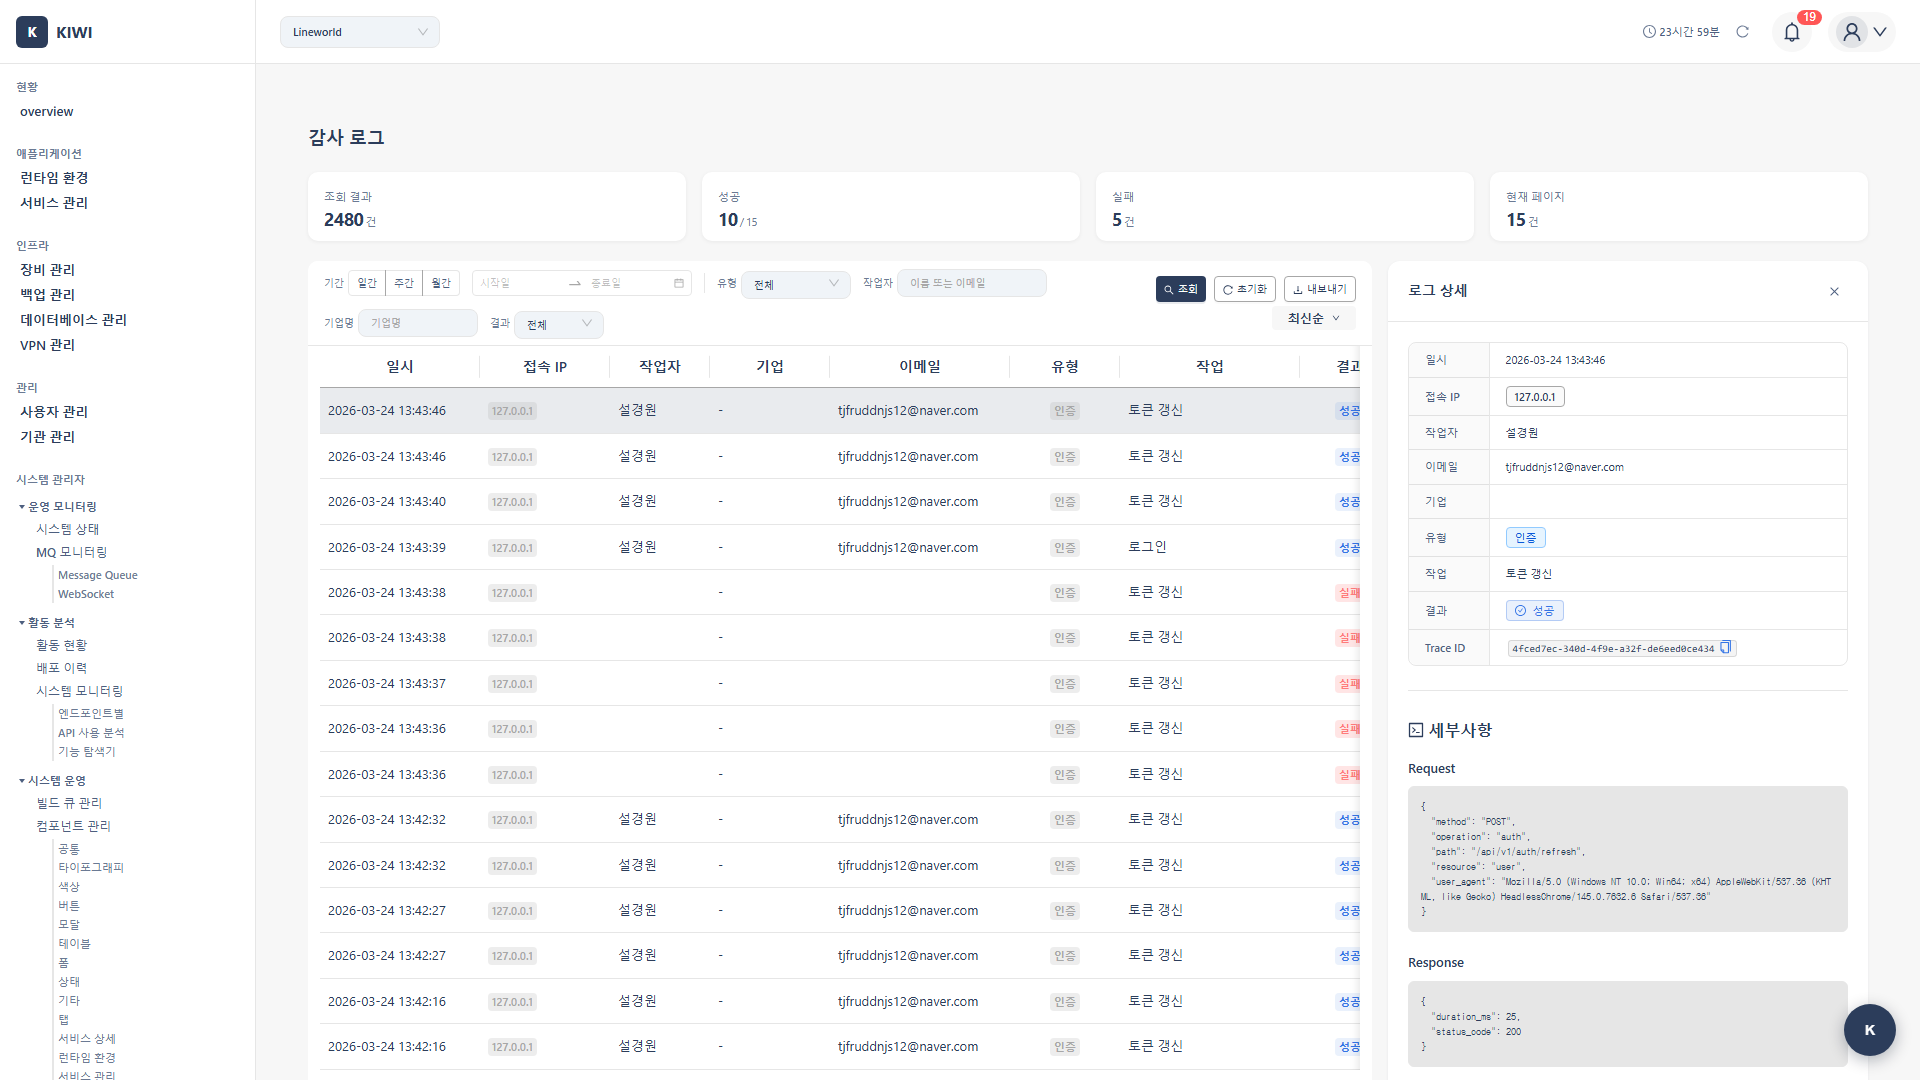
- Request IP address
- Request details
- Before/after change data
- Related resource links
Filtering Logs
How to view only logs matching specific conditions.
Step 1: Open the Filter Panel
Click the Filter button to open the filter panel.
Step 2: Set Period Filter
Select the time range to query:
- Today: Display only logs from today.
- Last 7 days: Display logs from the past week.
- Last 30 days: Display logs from the past month.
- Custom: Enter the start and end dates directly.
Step 3: Set Type Filter
Select the event type: choose from Authentication, Permission, Resource, Deployment, or System.
Step 4: Set User Filter
To view only a specific user's activity, select that user.
Step 5: Set Result Filter
Select the result status:
- All: Display all results.
- Success: Display only successful actions.
- Failure: Display only failed actions.
Step 6: Apply Filter
Click the Apply button. Only logs matching the filter conditions will be displayed.
Searching Logs
How to search logs by specific keywords.
Step 1: Use the Search Bar
Enter a search term in the search bar. The following fields are searched:
- Username/email
- Resource name
- IP address
- Action description
Step 2: Execute Search
Press the Enter key or click the search button. Logs containing the search term will be displayed.
Step 3: Advanced Search (Optional)
Click the Advanced Search button to enable field-specific searching:
user:admin@company.com- Search for activity by a specific useraction:delete- Search for deletion actions.resource:my-service- Search for actions related to a specific resource.ip:192.168.1.100- Search for activity from a specific IP
Exporting Logs
How to export audit logs to a file.
Step 1: Select Logs to Export
Choose the export method:
- Current filter results: Export the logs currently displayed.
- Selected items: Export only the logs selected with checkboxes.
- All: Export all logs.
Step 2: Click the Export Button
Click the Export button.
Step 3: Select Export Format
Choose a format:
- CSV: Good for analysis in spreadsheets.
- JSON: Good for programmatic processing.
- PDF: Suitable for reports and documentation.
Step 4: Configure Export Options
Set the options:
- Included fields: Select the columns to export.
- Date format: Select the date display format.
- Encoding: Select the file encoding. (UTF-8 recommended)
Step 5: Execute Export
Click the Export button. The file will be downloaded.
Security Event Monitoring
How to monitor suspicious activity.
Step 1: Apply Security Event Filter
Filter by the following conditions:
- Type: Authentication
- Result: Failure
Step 2: Check Login Failure Patterns
Pay attention to the following patterns:
- Multiple failures from the same IP: Possible brute force attack.
- Multiple failures on the same account: Possible account takeover attempt.
- Access at abnormal times: Possible unauthorized access.
Step 3: Review Permission Change History
Change the type filter to "Permission" to check for any abnormal permission changes.
Step 4: Configure Alerts (Optional)
Set up alerts to be notified when specific events occur:
- 5 or more login failures within 5 minutes.
- Admin permission changes
- Bulk data deletion
Setting Log Retention Policy [Manager]
How to set the retention period for audit logs.
Permission Notice: This feature is available to Managers only.
Step 1: Navigate to System Settings
Go to System Settings → Audit Log Settings.
Step 2: Configure Retention Policy
Set the retention period:
- Default retention period: Retention period for general logs. (Recommended: 90 days)
- Security log retention: Retention period for authentication/permission logs. (Recommended: 365 days)
- Archive settings: Configure whether to archive for long-term retention.
Step 3: Configure Auto-Deletion
Set the deletion policy:
- Auto-delete: Automatically delete logs that have exceeded the retention period.
- Archive then delete: Save to archive before deleting.
- Manual delete: Managed directly by an administrator.
Step 4: Save
Click the Save button. A message confirming the settings have been applied will appear.
Frequently Asked Questions
I only want to see activity from a specific user
You can use one of the following methods:
- User filter: Select the desired user in the filter panel.
- Advanced search: Enter
user:email-addressin the search bar. - Sort results: Click the user column to sort by user.
There are too many logs to find what I need
- Narrow the period: Limit the range to when the issue occurred.
- Select type: Filter only relevant event types.
- Result filter: View only failed actions.
- Advanced search: Combine queries like
action:delete resource:my-service
Old logs are not visible
Check the retention policy. Logs past the retention period may have been automatically deleted. If archiving is configured, you can check the archive storage.
Log export is not working
Causes and solutions:
- Insufficient permissions: Check that you have the
auditpermission. - Data size too large: Export in smaller time intervals.
- Browser issue: Try a different browser or disable popup blocking.
Related Guides
- User/Permission Management - User permission settings.
- Dashboard Usage - System status monitoring.