Build Wizard
Never written a Dockerfile before? Don't worry! Build Wizard analyzes your project and automatically generates an optimized Dockerfile for you. With just a few clicks, you can have your container build ready to go.
- Auto-detection: Automatically identifies project language, framework, and package manager.
- Optimized Templates: Best practices like multi-stage builds and non-root users are applied.
- Monorepo Support: Handles projects with multiple services at once.
- Ready to Use: Generated Dockerfile is auto-committed to GitLab, ready to build immediately.
When to Use
- New projects: Containerize a project started without a Dockerfile.
- Legacy migration: Convert an existing project to Docker-based.
- Monorepo setup: Containerize multiple services at once.
- Rapid prototyping: Quickly set up a build environment with optimized templates.
Projects that already have a Dockerfile skip Build Wizard and start building directly. If you want to replace an existing Dockerfile, you can generate a new one in Build Wizard.
Supported Frameworks
Node.js
- Next.js (SSR, port 3000): React full-stack framework supporting App Router and Pages Router.
- React (SPA, port 80): React SPA including CRA and Vite
- Vue.js (SPA, port 80): Vue 2/3 applications.
- Angular (SPA, port 80): Angular CLI projects.
- NestJS (API, port 3000): TypeScript backend framework
- Express.js (API, port 3000): Node.js web framework
Python
- FastAPI (API, port 8000): High-performance async API framework
- Django (API, port 8000): Python full-stack framework
- Flask (API, port 5000): Lightweight micro framework
- Streamlit (SSR, port 8501): Data app/dashboard framework
Java
- Spring Boot (API, port 8080): Java enterprise framework
- Quarkus (API, port 8080): Cloud-native Java
Other Languages
- Go (Compiled, port 8080): Uses go mod for package management.
- Rust (Compiled, port 8080): Uses cargo for package management.
- .NET/C# (Compiled, port 8080): Uses dotnet for package management.
- Ruby (API, port 3000): Uses bundler for package management.
- PHP (API, port 80): Uses composer for package management.
- Static Site (Static, port 80): No package manager required.
Understanding Build Types
Build Wizard automatically selects the appropriate build type based on the framework.
- SPA (Static site / Single Page Application): Final image contains Nginx + built static files.
- SSR (Server-side rendering): Final image contains Node.js runtime + application.
- API (Backend API server): Final image contains runtime + application code.
- Compiled (Compiled language like Go, Rust): Final image contains binary only (lightweight image)
- Static (Pure static files): Final image contains Nginx + HTML/CSS/JS
Dockerfile structure, base image, and run commands differ based on build type. For example, SPA is served via Nginx after building, while SSR handles requests directly through a Node.js server.
Build Wizard Flow
Step 0: Project Analysis → Step 1: Build Settings → Step 2: File Preview → Step 3: GitLab Commit
flowchart LR
    A[Open Build Wizard] --> B[Detect Project Type]
    B --> C{Monorepo?}
    C -->|Yes| D[Select Services]
    C -->|No| E[Single Config]
    D --> F[Generate Template]
    E --> F
    F --> G[Edit Files]
    G --> H[Commit to GitLab]
    H --> I[Ready to Build]
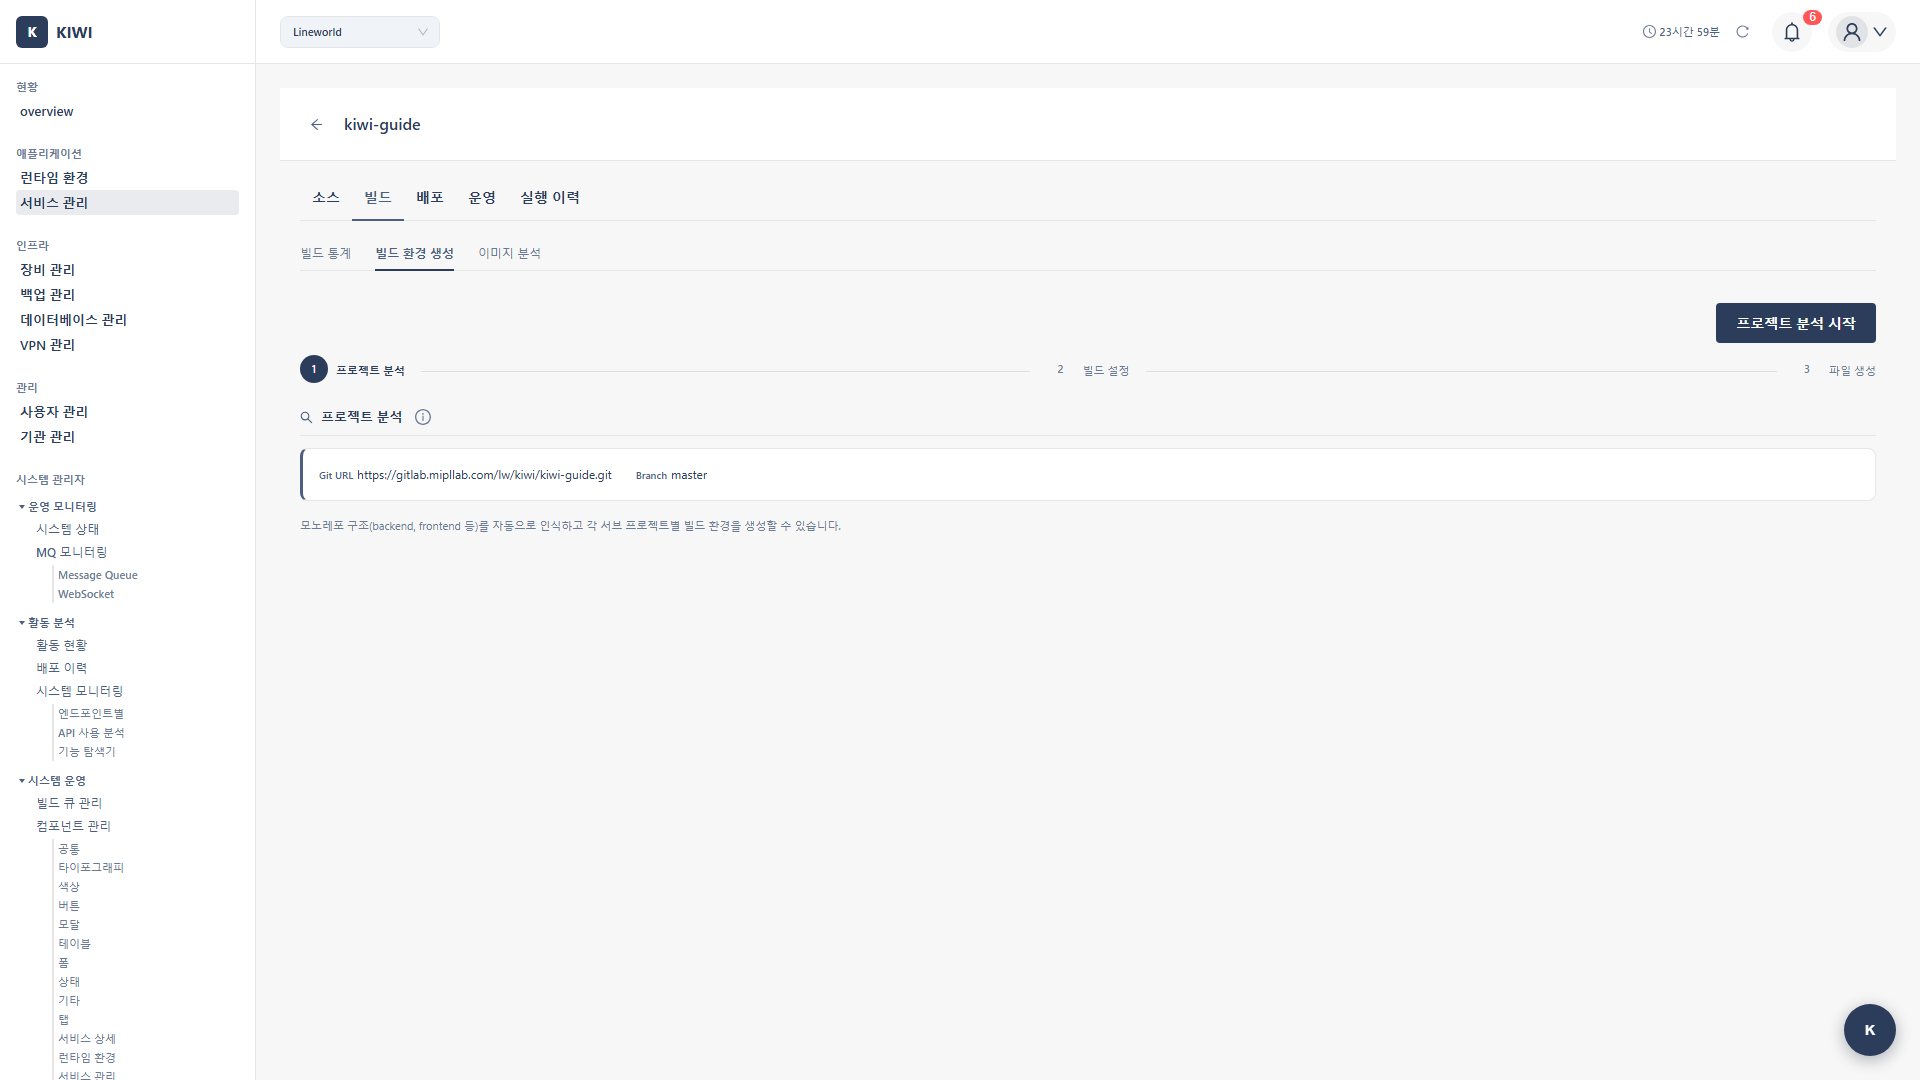
Step 0: Open Build Wizard
How to Open
- Navigate to the [Service Management] page
- Click the Build stage on the row for the service to configure
- The Build Wizard modal opens automatically.
Auto-open Conditions
- No Dockerfile: Build Wizard opens automatically.
- Dockerfile present: Build starts immediately.
- Only docker-compose.yml: Build Wizard opens (notification that Dockerfile is needed)
Modal Components
- Steps display: Shows current progress (0~3)
- Git URL: Repository URL to analyze (auto-filled)
- Branch: Target branch (pulled from service settings)
- Detect project type button: Click to start analysis.
Step 1: Detect Project Type
1.1 Run Detection
Click the Detect Project Type button and KIWI analyzes the GitLab repository.
1.2 Analysis Items
- Project type: Detected by the presence of config files. (e.g.,
package.json→ Node.js) - Framework: Detected by dependency analysis. (e.g.,
nextpackage → Next.js) - Package manager: Verified by lock file. (e.g.,
yarn.lock→ Yarn) - TypeScript: Whether tsconfig.json exists. (Yes/No)
- Build type: Determined by framework. (e.g., Next.js → SSR)
- Monorepo: Detected by sub-directory analysis. (e.g.,
frontend/,backend/)
1.3 Detection Result Screen
Single Project
Project analysis complete!

Project type: Node.js
Framework: Next.js
Package manager: npm
Build type: SSR (Server-side rendering)
TypeScript: Yes
Default port: 3000
Monorepo
Monorepo detected: 3 sub-projects found

┌────────────┬───────────┬─────────────┬──────────┐
│ Path       │ Type      │ Framework   │ Select   │
├────────────┼───────────┼─────────────┼──────────┤
│ frontend/  │ Node.js   │ React       │ ✓        │
│ backend/   │ Python    │ FastAPI     │ ✓        │
│ admin/     │ Node.js   │ Vue.js      │ ✓        │
└────────────┴───────────┴─────────────┴──────────┘
1.4 Existing File Warning
If a Dockerfile or docker-compose.yml already exists:
Files already exist: Dockerfile, docker-compose.yml
Proceeding will overwrite these files.
Step 2: Build Settings
2.1 Single Project Settings
Basic Settings
- Project type: Detected language. Editable. (e.g., Node.js)
- Service name: Name used in docker-compose. (e.g.,
my-app) - Port number: Port exposed by the container. (e.g., 3000)
Language Version Settings
- Version: Language runtime version. (e.g., Node.js 18, 20, 22)
- Base OS: Container base OS. (alpine, slim, bullseye)
- alpine: Minimum image size (fewer vulnerabilities in security scans)
- slim: Lightweight Debian-based (better compatibility)
- bullseye/bookworm: Full Debian (all packages available)
Advanced Options (Collapse section)
- Health Check (enabled by default): Adds container health checks. Required in production environments.
- Non-root User (enabled by default): Run as a non-root user. Recommended for security.
2.2 Monorepo Settings
Service Selection Table
- Select: Checkbox for services to build
- Path: Sub-project directory path
- Project type: Detected language
- Framework: Detected framework
- Version: Selectable language version.
- Base OS: Selectable OS
- Port: Per-service port settings.
Advanced Options Per Service
Individually configurable for each service:
- Enable/disable Health Check
- Enable/disable Non-root User
2.3 Generate Template
Click the Generate Template button to create a Dockerfile and docker-compose.yml matching the settings.
Step 3: File Preview and Editing
3.1 Monaco Editor
Generated files are displayed in Monaco Editor (VS Code-based).
- Syntax highlighting: Dockerfile and YAML syntax highlighting.
- Autocomplete: Keyword autocomplete support
- Error checking: Real-time syntax error display
- Line numbers: Line number display
3.2 Generated Files
Single Project
Dockerfile(root): Container image builddocker-compose.yml(root): Local development orchestration.
Monorepo
Dockerfile(each service directory): Per-service image builddocker-compose.yml(root): Full service orchestration.
3.3 Dockerfile Examples
Next.js (SSR)
# Build stage
FROM node:20-alpine AS builder
WORKDIR /app
COPY package*.json ./
RUN npm ci --only=production=false
COPY . .
RUN npm run build
# Production stage
FROM node:20-alpine AS production
WORKDIR /app
# Non-root user setup
RUN addgroup -g 1001 -S nodejs && \
adduser -S nextjs -u 1001
COPY /app/.next/standalone ./
COPY /app/.next/static ./.next/static
COPY /app/public ./public
USER nextjs
EXPOSE 3000
# Health check
HEALTHCHECK \
CMD wget --no-verbose --tries=1 --spider http://localhost:3000/ || exit 1
CMD ["node", "server.js"]
React (SPA)
# Build stage
FROM node:20-alpine AS builder
WORKDIR /app
COPY package*.json ./
RUN npm ci
COPY . .
RUN npm run build
# Production stage
FROM nginx:alpine
COPY /app/build /usr/share/nginx/html
COPY nginx.conf /etc/nginx/conf.d/default.conf
EXPOSE 80
HEALTHCHECK \
CMD wget --no-verbose --tries=1 --spider http://localhost/ || exit 1
CMD ["nginx", "-g", "daemon off;"]
FastAPI (Python)
FROM python:3.11-slim
WORKDIR /app
# Non-root user
RUN addgroup --system app && adduser --system --group app
COPY requirements.txt .
RUN pip install --no-cache-dir -r requirements.txt
COPY . .
RUN chown -R app:app /app
USER app
EXPOSE 8000
HEALTHCHECK \
CMD python -c "import urllib.request; urllib.request.urlopen('http://localhost:8000/health')" || exit 1
CMD ["uvicorn", "main:app", "--host", "0.0.0.0", "--port", "8000"]
Spring Boot (Java)
# Build stage
FROM eclipse-temurin:17-jdk AS builder
WORKDIR /app
COPY . .
RUN ./gradlew bootJar --no-daemon
# Production stage
FROM eclipse-temurin:17-jre
WORKDIR /app
RUN addgroup --system spring && adduser --system --group spring
COPY /app/build/libs/*.jar app.jar
RUN chown -R spring:spring /app
USER spring
EXPOSE 8080
HEALTHCHECK \
CMD curl -f http://localhost:8080/actuator/health || exit 1
ENTRYPOINT ["java", "-jar", "app.jar"]
Go
# Build stage
FROM golang:1.21-alpine AS builder
WORKDIR /app
COPY go.mod go.sum ./
RUN go mod download
COPY . .
RUN CGO_ENABLED=0 GOOS=linux go build -a -installsuffix cgo -o main .
# Production stage
FROM alpine:latest
RUN apk --no-cache add ca-certificates
WORKDIR /app
RUN addgroup -S app && adduser -S app -G app
COPY /app/main .
RUN chown -R app:app /app
USER app
EXPOSE 8080
HEALTHCHECK \
CMD wget --no-verbose --tries=1 --spider http://localhost:8080/health || exit 1
CMD ["./main"]
3.4 docker-compose.yml Examples
Single Service
version: '3.8'
services:
  my-app:
    build:
      context: .
      dockerfile: Dockerfile
    ports:
      - "3000:3000"
    environment:
      - NODE_ENV=production
    restart: unless-stopped
Monorepo (Multiple Services)
version: '3.8'
services:
  frontend:
    build:
      context: ./frontend
      dockerfile: Dockerfile
    ports:
      - "3000:3000"
    depends_on:
      - backend
    restart: unless-stopped

  backend:
    build:
      context: ./backend
      dockerfile: Dockerfile
    ports:
      - "8000:8000"
    environment:
      - DATABASE_URL=postgresql://db:5432/app
    restart: unless-stopped

  admin:
    build:
      context: ./admin
      dockerfile: Dockerfile
    ports:
      - "3001:80"
    restart: unless-stopped
3.5 File Customization
You can directly edit the generated files as needed.
Common modifications:
- Add environment variables:
ENV NODE_ENV=production - Change port:
EXPOSE 8080 - Install additional packages:
RUN apk add --no-cache curl - Change build command:
RUN npm run build:prod - Volume mount: Add volumes to docker-compose.
Step 4: GitLab Commit
4.1 Execute Commit
Click the Commit to GitLab button to automatically commit the generated files to the repository.
4.2 Commit Information
- Commit message:
chore: Add Dockerfile generated by KIWI Build Wizard - Branch: Default branch configured in the service.
- Author: KIWI System
4.3 Generated Files
- Single project:
Dockerfile,docker-compose.yml - Monorepo:
frontend/Dockerfile,backend/Dockerfile,docker-compose.yml
4.4 Commit Complete
- Verify the "Build environment files have been committed to GitLab!" message
- Build Wizard closes automatically.
- Now click the Build stage again to start the build
Real-world Usage Scenarios
Scenario 1: Containerizing a New Next.js Project
Situation: You want to deploy a project created with create-next-app using KIWI.
Steps:
- Register a service in [Service Management] (enter Git URL)
- Click Build → Build Wizard opens automatically.
- Click Detect project type
- Review detection results: Next.js, npm, SSR type
- Select version: Node.js 20, alpine
- Advanced options: Health Check checked, Non-root checked.
- Click Generate Template
- Review Dockerfile content (Next.js standalone mode optimized)
- Click Commit to GitLab
- Ready to build!
Scenario 2: Monorepo Project Setup
Situation: Deploying a monorepo with a Frontend(React) + Backend(FastAPI) structure.
Steps:
- Enter monorepo Git URL when registering the service.
- Click Build → Build Wizard opens.
- Click Detect project type
- Monorepo detected: 2 sub-projects.
- Configure in the service selection table:
frontend/: React, Node.js 20, alpine, port 3000backend/: FastAPI, Python 3.11, slim, port 8000
- Click Generate Template
- Review Dockerfile for each service and root docker-compose.yml
- Click Commit to GitLab
- Both services ready to build!
Scenario 3: Legacy Spring Boot App Migration
Situation: Migrating an existing Spring Boot project to containers.
Steps:
- Register service
- Click Build → Build Wizard opens.
- Detect project type: Spring Boot, Gradle.
- Verify settings:
- Java version: 17 (based on project's sourceCompatibility)
- Base OS: Eclipse Temurin JRE
- Advanced options: Health Check checked (using Spring Actuator)
- Click Generate Template
- Review and modify Dockerfile:
- Customize Gradle build command if needed.
- Verify Actuator health endpoint path
- Click Commit to GitLab
Troubleshooting
Project Type Detection Failure
- Detected as "Unknown" type: No standard config files. Add
package.json,pom.xml,go.mod, etc. - Framework not detected: Dependency analysis failed. Manually select the framework.
- Analysis timeout: Large repository. Limit scope to a specific branch.
GitLab Connection Error
- 401 Unauthorized: Token expired. Renew the GitLab Access Token.
- 403 Forbidden: Insufficient permissions. Check
api,write_repositorypermissions for the token. - 404 Not Found: Repository/branch not found. Verify the Git URL and branch name.
Commit Failure
- "Protected branch": Branch is protected. Use a different branch or remove protection.
- "Merge conflict": File conflict occurred. Delete the existing files and retry.
- "File too large": Large file exists. Add exclusion settings to
.gitignore.
Build File Generation Error
- Invalid port: Auto-detection error. Manually specify the port number.
- Build command error: Non-standard script. Edit the Dockerfile directly.
- Dependency installation failure: Private registry issue. Add authentication settings to Dockerfile.
Monorepo-related Issues
- Sub-projects not detected: Non-standard structure. Add config files to each sub-directory.
- Inter-service dependencies: docker-compose configuration needed. Manually add depends_on.
- Shared code references: Build context issue. Consider a root-level Dockerfile.
Best Practices
Dockerfile Optimization
- Use multi-stage builds: Exclude build tools from production image
- Leverage layer caching: Copy frequently changing files last
- Use alpine base: Minimize image size
- Non-root user: Enhance container security.
- Add health check: Support K8s/Docker health management.
Security Considerations
- Do not hardcode secrets in Dockerfile.
- Exclude sensitive files with
.dockerignore - Run as non-root user.
- Update base images regularly.
- Exclude source code with multi-stage builds.
Related Guides
- Auto CI Setup - Webhook-based automatic build
- Manual Build - Trigger builds directly.
- K8s Deployment - Kubernetes deployment.
- Docker Deployment - Docker environment deployment.