DAST Scan
Some vulnerabilities can't be found just by looking at code. DAST (Dynamic Application Security Testing) detects vulnerabilities by sending HTTP requests to an application that's actually running. It tests the application as if a hacker were attacking from the outside.
SAST analyzes code, but it can't find server configuration errors or deployment environment issues. For example, missing security headers, cookie configuration errors, and CORS configuration problems can only be verified when the application is actually running. DAST finds these runtime vulnerabilities.
Overview
- Analysis target: Running web applications.
- Stage: Operate stage (after deployment)
- Analysis engine: OWASP ZAP
- Analysis method: Analyzes responses to actual HTTP requests.
DAST Characteristics
Advantages
DAST provides unique advantages that only it can offer:
- Real environment testing: Test in the same environment as production to understand actual risks.
- Configuration error detection: Find security issues in web server, framework, and cloud settings.
- Authentication testing: Verify login bypass, session management vulnerabilities, and other authentication-related issues.
- Runtime vulnerabilities: Detect issues that only appear during execution and can't be known from code alone
SAST vs DAST: When to Use Which?
SAST (Static Analysis):
- Analysis target: Source code.
- Stage: During development (Source stage)
- False positive rate: Relatively high
- Scope: Entire codebase
- Detectable issues: Code-level vulnerabilities.
- Advantage: Find problems early in development.
DAST (Dynamic Analysis):
- Analysis target: Running app
- Stage: After deployment (Operate stage)
- False positive rate: Relatively low
- Scope: Only accessible endpoints.
- Detectable issues: Configuration errors, runtime vulnerabilities.
- Advantage: Find real environment issues.
SAST and DAST are complementary. Run SAST during development and DAST after deployment to cover different types of vulnerabilities.
Step 1: Starting a DAST Scan
- Navigate to the [Service Management] page
- Select the service to analyze
- Click the Operate stage
- Select the DAST tab
- Click the Start Scan button.
Step 2: Configuring Scan Target
2.1 Enter Target URL
Enter the URL of the application to scan:
- Target URL: The base URL of the scan target
- e.g.,
https://api.company.comorhttps://staging.myapp.com
- e.g.,
- Base Path: The path to start scanning from (optional)
- e.g.,
/api/v1- for API servers, start from the API path
- e.g.,
2.2 Authentication Settings (Optional)
If the application requires login, configure authentication information:
- None: Scan only public areas without authentication.
- Basic Auth: HTTP Basic authentication (username/password)
- Bearer Token: JWT token authentication (Authorization: Bearer header)
- Cookie: Session cookie (enter cookie value after login)
Scanning without authentication won't find vulnerabilities in pages accessible only after login. If important functionality is behind login, be sure to configure authentication information.
Step 3: Configuring Scan Options
3.1 Select Scan Type
Choose the scan type that fits your purpose:
-
Baseline (Passive Scan)
- Duration: 5-10 minutes
- Characteristics: Only analyzes responses, doesn't send aggressive requests.
- Recommended environment: Development environments, CI pipelines.
- Detectable: Missing security headers, cookie configuration issues, etc.
-
Full (Active Scan)
- Duration: 30 minutes - 2 hours.
- Characteristics: Sends malicious payloads to test SQL Injection, XSS, etc.
- Recommended environment: Staging environments.
- Detectable: SQL Injection, XSS, CSRF, and most vulnerabilities.
-
API (API-specific Scan)
- Duration: 15-30 minutes
- Characteristics: Scanning optimized for REST API endpoints.
- Recommended environment: API servers.
- Detectable: API authentication bypass, parameter tampering, etc.
3.2 Configure Scan Scope
Reduce unnecessary scanning and improve efficiency:
- Depth: Limit URL crawling depth (e.g., up to 3 levels)
- Scope: Restrict scan scope to specific paths (e.g., scan only
/api/*) - Exclude: Specify paths to exclude from scanning (e.g., exclude
/admin/*)
Full scans send actual attack payloads to test SQL Injection, etc. In production environments, the following issues can occur:
- Large volume of requests: Increased server load
- Data modification: Malicious payloads may modify data
- Service impact: Possible temporary errors or performance degradation.
In production, run only Baseline scans, or run Full scans in staging environments.
Step 4: Running the Scan
4.1 Scan Progress
When the scan starts, it proceeds through the following stages:
[1/5] Initializing ZAP...           <- Initializing OWASP ZAP
[2/5] Crawling target site...       <- Crawling target site
   -> Found 45 URLs                  <- Found 45 URLs
   -> Found 12 forms                 <- Found 12 forms
[3/5] Running passive scan...       <- Running passive scan
   -> Analyzing headers...           <- Analyzing response headers
   -> Checking cookies...            <- Checking cookie settings
[4/5] Running active scan...        <- Running active scan (Full only)
   -> Testing SQL injection...       <- Testing SQL Injection
   -> Testing XSS...                 <- Testing XSS
   -> Testing CSRF...                <- Testing CSRF
[5/5] Generating report...          <- Generating report
Scan completed!                     <- Complete
4.2 Scan Status
- Idle: Waiting for scan
- Crawling: Collecting URLs - exploring all pages of the target site.
- Analyzing: Analyzing vulnerabilities - passive/active scan in progress.
- Completed: Scan complete - results available.
- Failed: Scan failed - check error message
Step 5: Reviewing Results
5.1 Results Summary
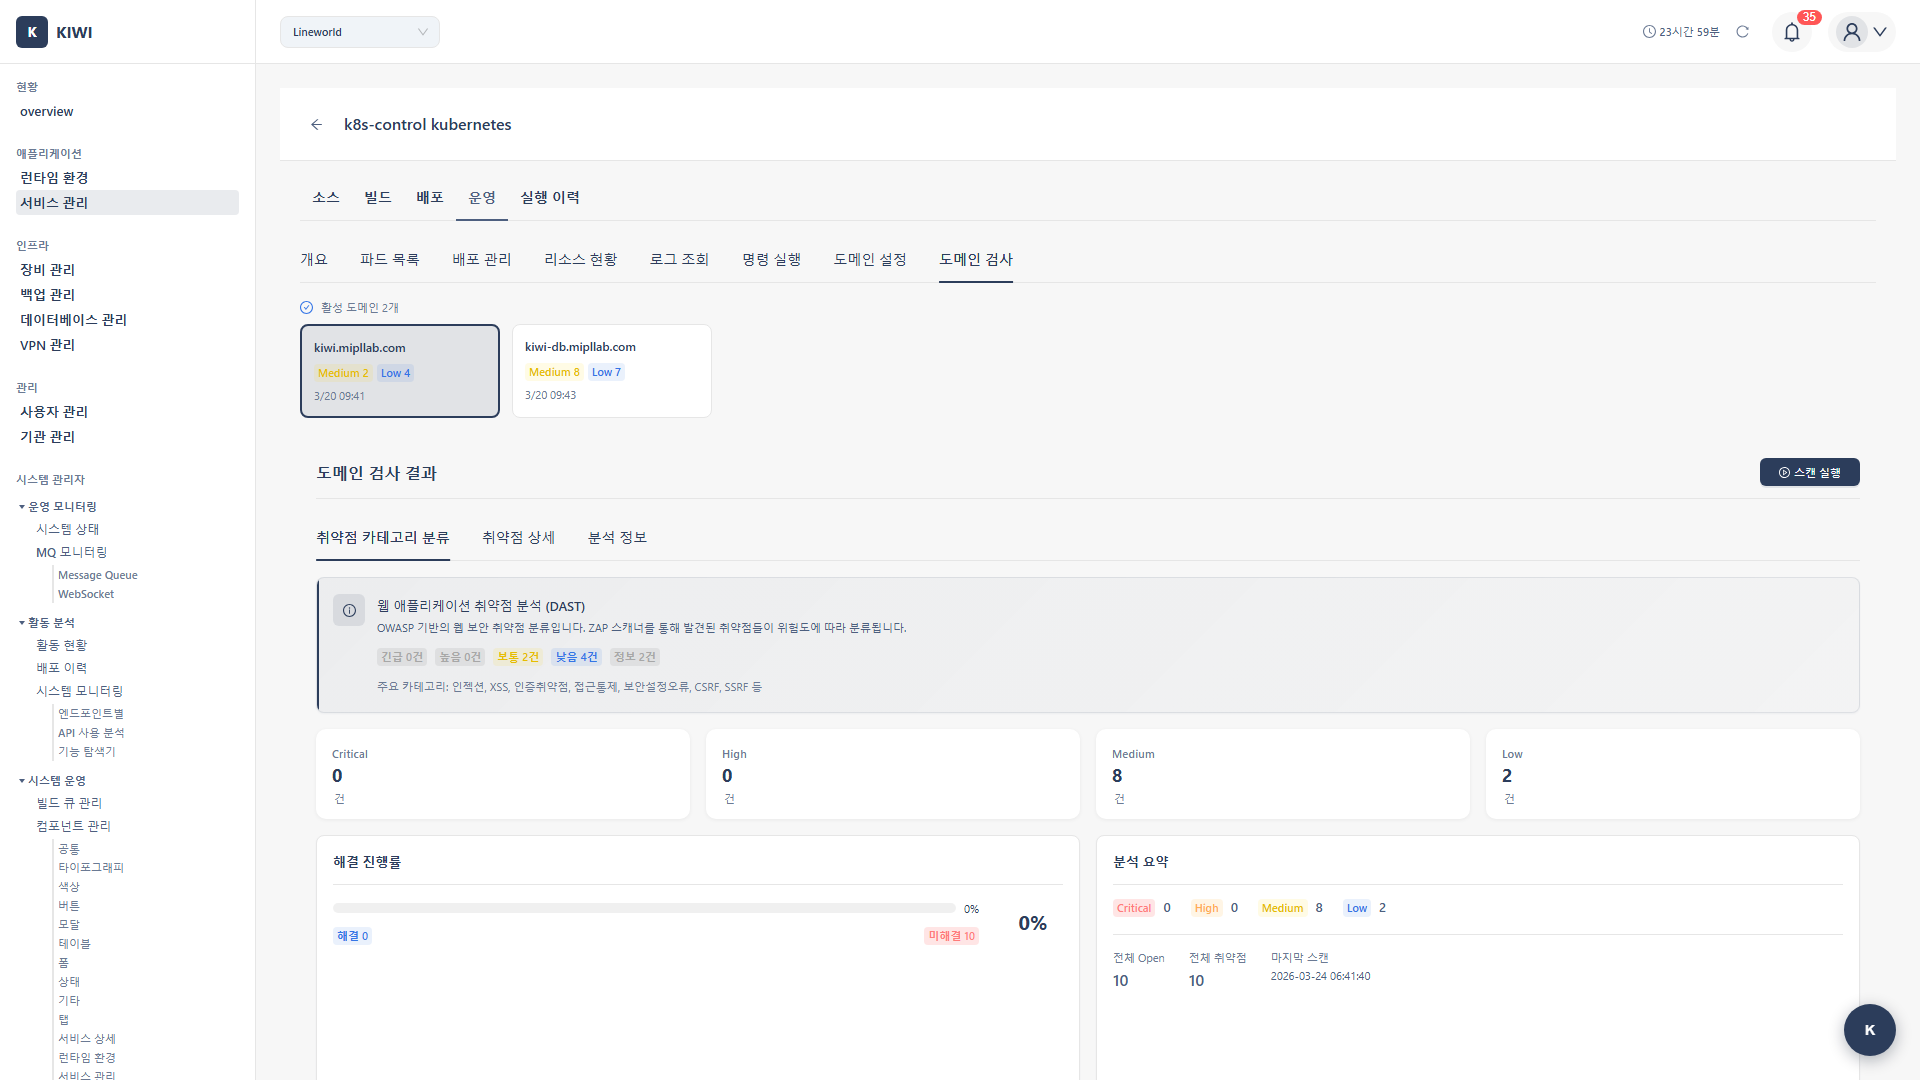
Once the scan is complete, you can see the following information at a glance:
- Total alerts: Total number of detected vulnerabilities and issues.
- Risk distribution: Breakdown by High/Medium/Low/Info
- Scanned URLs: Number of URLs tested.
- Request count: Number of HTTP requests sent.
5.2 Vulnerability Details
Click each vulnerability to see the following information:
- Alert Type: Vulnerability type (e.g., SQL Injection, XSS)
- Risk Level: Risk level (High/Medium/Low/Informational)
- URL: URL where the vulnerability was found
- Parameter: Name of the vulnerable parameter.
- Evidence: Evidence of vulnerability (request/response content)
- Solution: Recommended fix
- Reference: Reference links to OWASP, CWE, etc.
Evidence includes the actual request and response. This allows you to reproduce the vulnerability and verify after fixing. Sharing Evidence when reporting vulnerabilities to developers speeds up understanding.
Key Detected Vulnerabilities
Injection Vulnerabilities
Vulnerabilities where external input is interpreted as code or queries.
- SQL Injection (High): User input is inserted into SQL queries, allowing database manipulation.
- OS Command Injection (High): User input is executed as system commands.
- LDAP Injection (High): User input is inserted into LDAP queries.
XSS (Cross-Site Scripting)
Vulnerabilities where malicious scripts are injected into web pages.
- Reflected XSS (Medium): URL parameter values are output directly to the page
- Stored XSS (High): Malicious scripts are stored on the server and displayed to other users.
- DOM-based XSS (Medium): XSS occurring in client-side JavaScript
Configuration Errors
Security issues in server or application settings.
- Missing Security Headers (Low-Medium): Security headers such as CSP and X-Frame-Options are missing. Solution: Add security headers in web server configuration.
- Cookie Flags (Medium): Secure/HttpOnly flags are not set on cookies. Solution: Set flags when creating cookies.
- CORS Misconfiguration (Medium): The application is accessible from origins that should not be allowed. Solution: Review and fix the CORS policy.
- Directory Listing (Low): Directory listing is exposed externally. Solution: Disable directory listing in web server configuration.
Authentication/Session Vulnerabilities
Vulnerabilities related to login and session management.
- Broken Authentication (High): Attacker can bypass authentication and access as another user. Solution: Review and fix authentication logic.
- Session Fixation (High): Attacker can fix the session ID and hijack the account. Solution: Regenerate session ID on login.
- CSRF (Medium): Malicious requests are executed without the user's knowledge. Solution: Implement CSRF tokens.
Configuring Automatic Scans
Automatic Scan After Deployment
You can configure DAST scans to run automatically each time deployment completes.
- Enable DAST in Auto CI Settings
- Configure scan type and target URL
- Scan runs automatically after deployment completes.
- Receive notifications when vulnerabilities are found
Scheduled Scans
Set up scheduled scans for regular security checks:
- Daily: Check frequent changes in development environments.
- Weekly: Run with integration tests in staging environments.
- Monthly: Regular security checks in production environments.
Scans can put load on servers, so schedule them during low-usage times (early morning, weekends, etc.).
Troubleshooting
Scan Failure
-
URL inaccessible: Verify the target URL is accessible from the KIWI server. Check firewall or VPN settings.
-
Authentication failure: Verify authentication credentials are correct. The token may have expired or the session may be invalid.
-
Timeout: The target site may be too large or slow to respond. Reduce scan scope or scan only specific paths.
-
SSL error: If using a self-signed certificate, disable SSL verification option.
Handling False Positives
DAST can also sometimes report things as vulnerabilities that aren't actually vulnerable.
-
Mark as False Positive: Mark confirmed false positives to exclude them from future scans.
-
Adjust rules: If a specific rule generates too many false positives, disable that rule.
-
Add context: Providing authentication or session information can yield more accurate results.
Too many false positives increase security team fatigue and can cause real vulnerabilities to be missed. Actively mark confirmed false positives to exclude them from future scans.
Related Guides
- SAST Scan - Source code analysis.
- SCA Scan - Dependency analysis.
- Operations Management - Service monitoring.