User/Permission Management
User/permission management determines who can access what in KIWI. This guide explains how to invite users, manage roles, and configure permissions.
Why Is Permission Management Important?
Proper permission management is essential for security and collaboration:
- Employee leaves: Without permissions, the account remains active creating a security risk. With permissions, you can immediately deactivate the account.
- Accidental deletion: Without permissions, any user can delete critical resources. With permissions, only authorized users can modify.
- Audit compliance: Without permissions, you cannot prove who did what. With permissions, you have clear activity tracking by user.
- Team collaboration: Without permissions, everyone sees everything. With permissions, each team accesses only what they need.
Permission System
KIWI uses a role-based permission system. Permissions are divided by feature:
Grant the minimum necessary permissions. This limits the blast radius if an account is compromised and prevents accidental mistakes.
- device: Access the [Device Management] page to manage servers/devices.
- infra: Access the [Infrastructure Management] and [Runtime Environment] pages to manage K8s/Docker environments.
- service: Access the [Service Management] page to perform service builds/deployments.
- backup: Access the [Backup Management] page to perform backup/recovery.
- database: Access the [Database Management] page to manage databases.
- audit: Access the [Audit Log] page to view logs.
- vpn: Access the [VPN Management] page to configure VPN.
- user: Access the [User Management] and [Permission Management] pages to manage users/permissions.
Inviting a New User
How to invite team members to KIWI.
Permission Notice: This feature is available to Managers. If you cannot access this feature, please request permission from your organization manager.
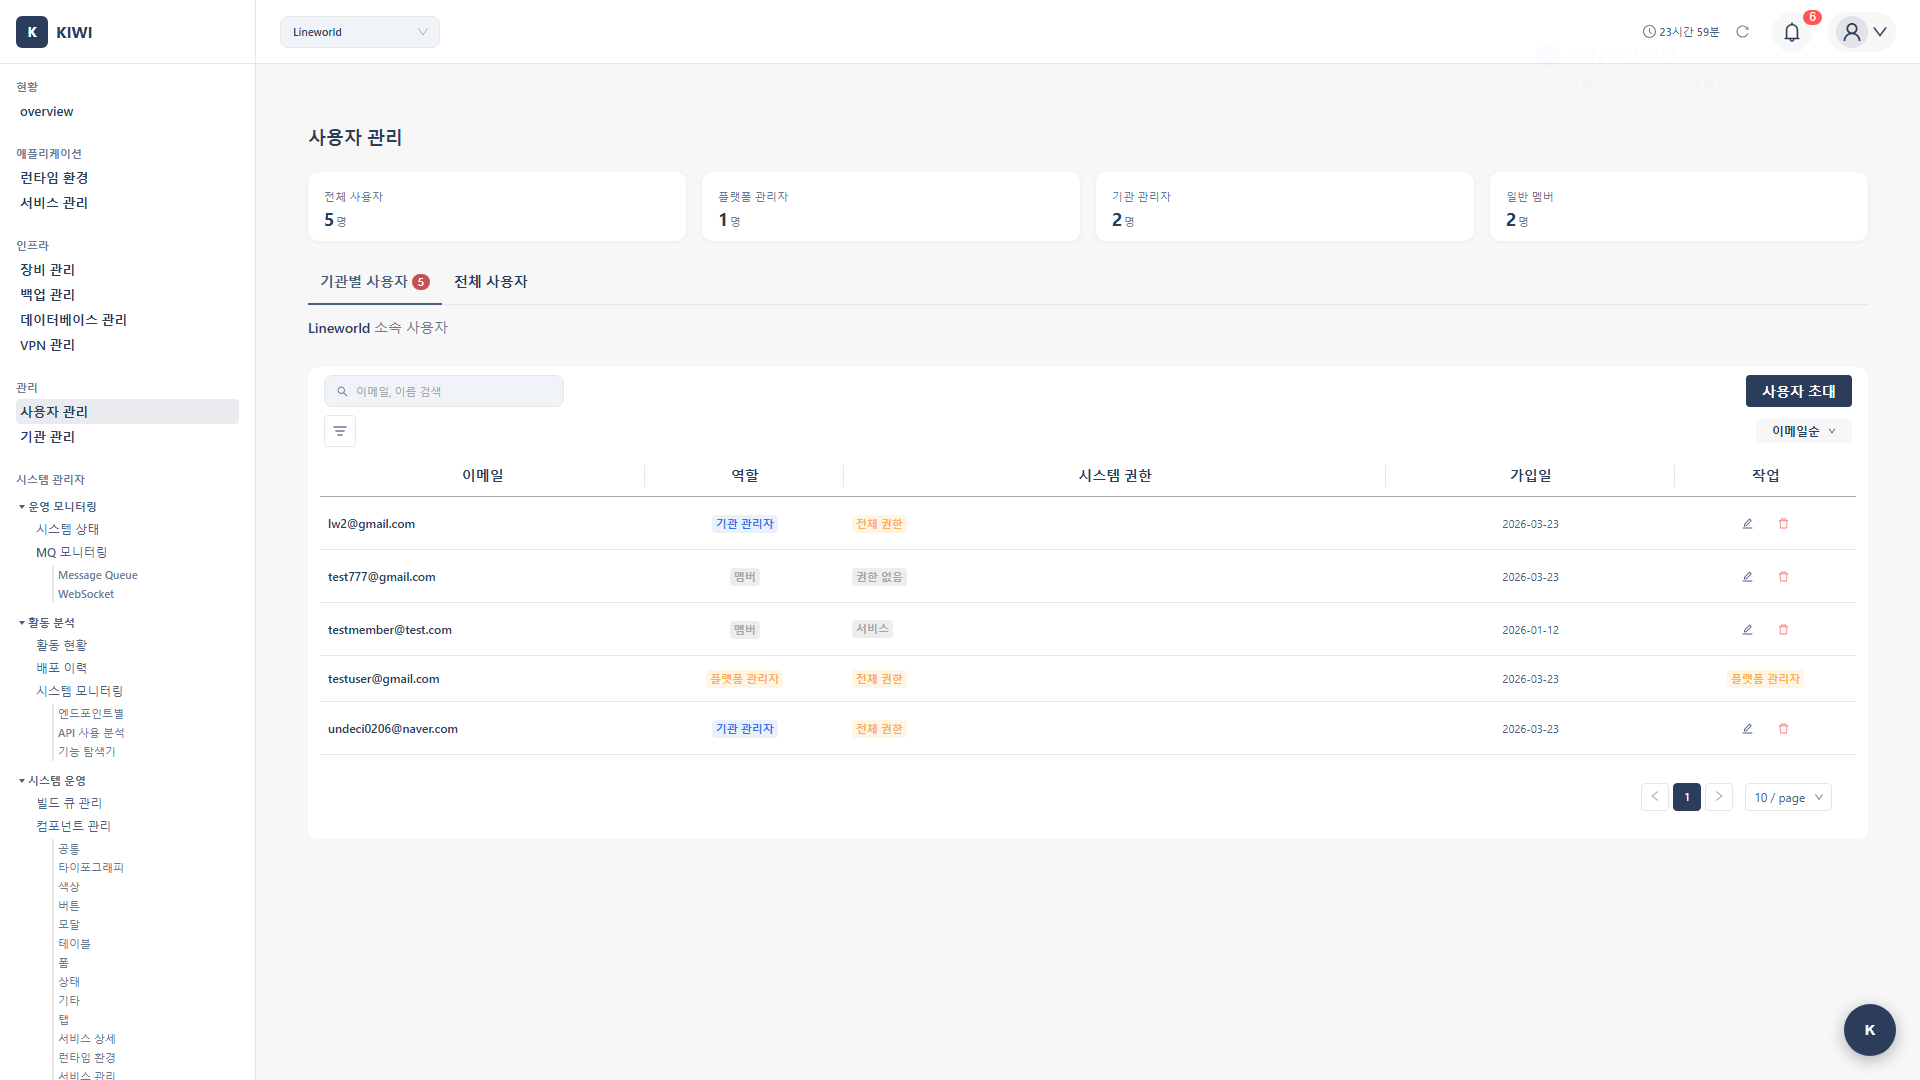
Step 1: Navigate to the User Management Page
Click [User Management] in the left menu.
Step 2: Start User Invitation
Click the Invite User button in the top right. The invitation modal opens.
Step 3: Enter Invitation Information
Enter the information for the user to invite:
- Email (required): The email address of the user to invite.
- Name (required): The display name of the user.
- Role (required): Select the default role.
- Organization: The user's organization. (If applicable)
Step 4: Select a Role
Select the user's role:
- Viewer: View only. Read-only permissions are granted.
- Developer: Performs development tasks.
serviceanddevicepermissions are granted by default. - Operator: Performs operations tasks.
infra,backup, anddatabasepermissions are granted by default. - Manager: Performs management tasks. Full permissions are granted.
- Admin: System administrator. Highest administrator permissions are granted.
Step 5: Send Invitation
Click the Send Invitation button. An invitation email is sent to the entered address.
Step 6: Check Invitation Status
Check the invitation status in the invitation list:
- Pending: The user has not yet accepted the invitation.
- Accepted: The user has accepted the invitation and registration is complete.
- Expired: The invitation period has expired. Resending is required.
Changing User Permissions
How to change a specific user's permissions.
Permission Notice: This feature is available to Managers. If you cannot access this feature, please request permission from your organization manager.
Step 1: Navigate to the Permission Management Page
Click [Permission Management] in the left menu.
Step 2: Select a User
Click the user whose permissions you want to change in the user list.
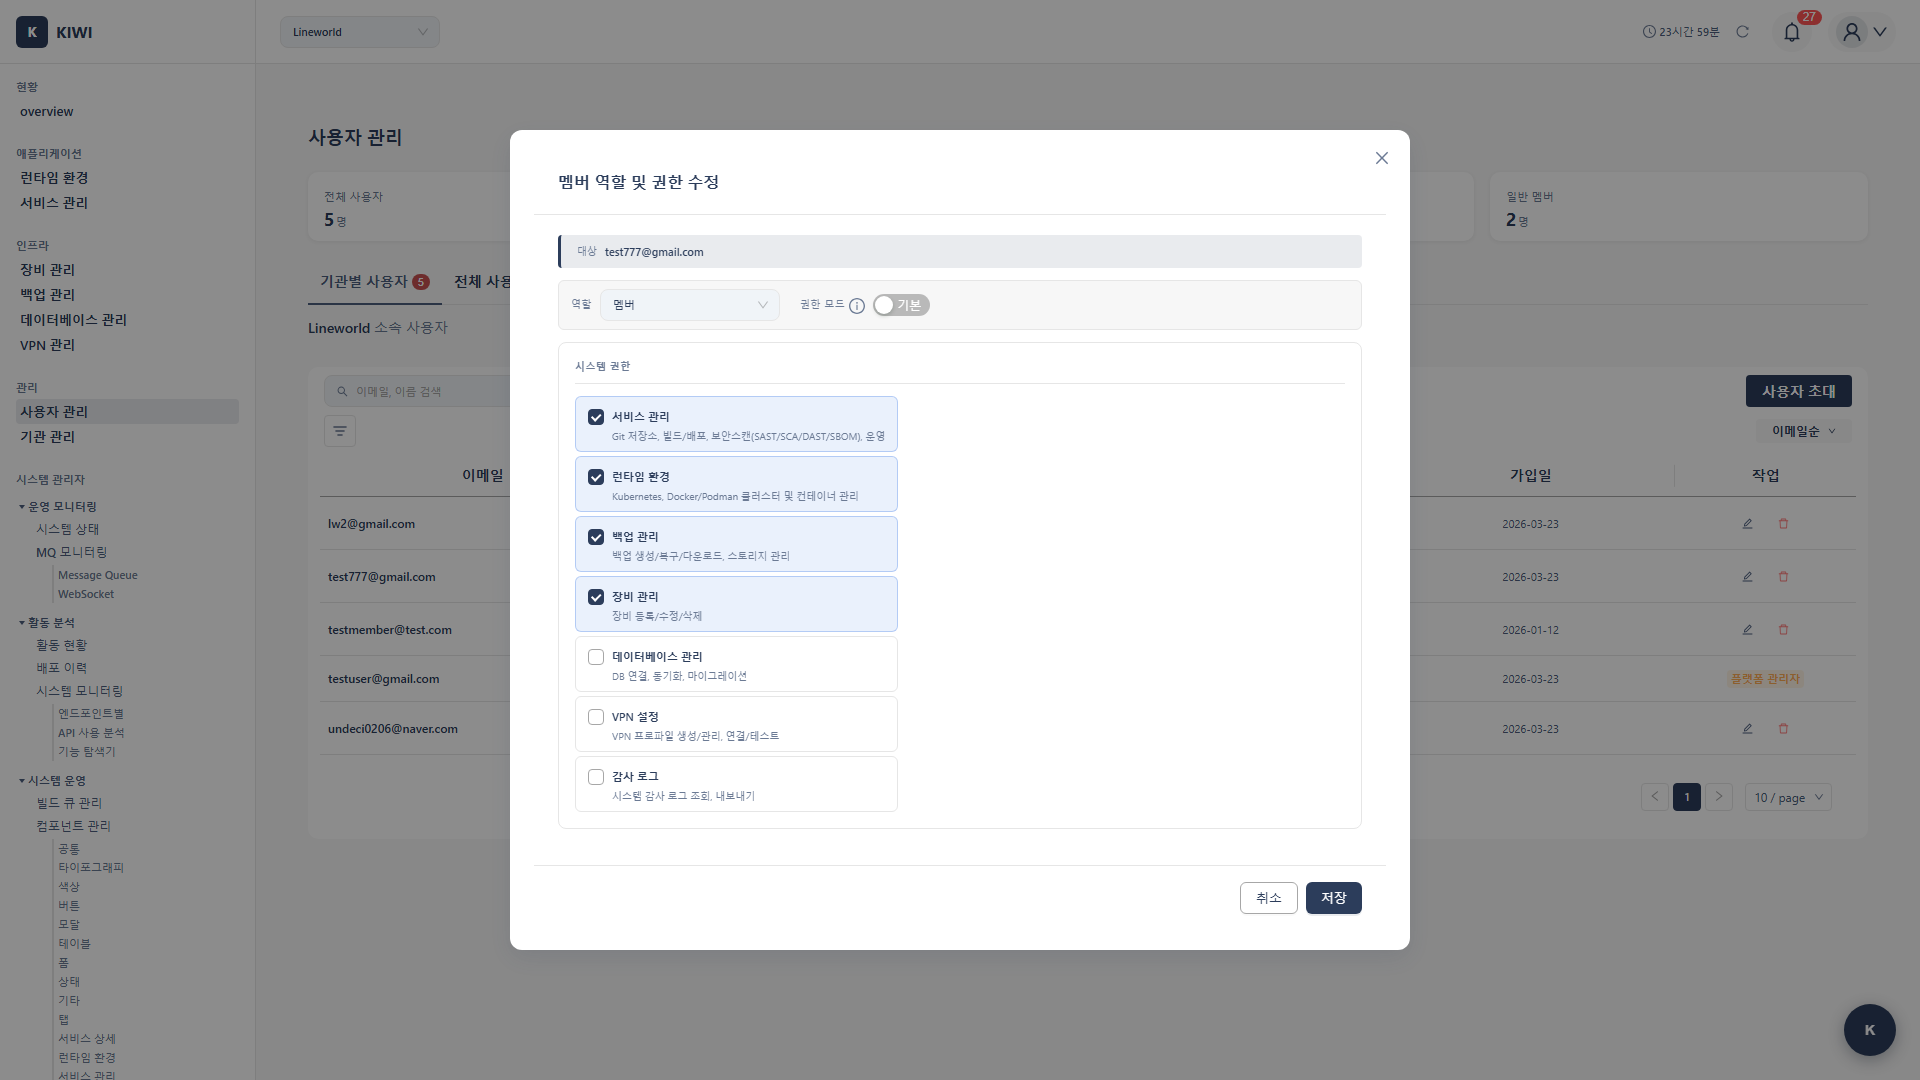
Step 3: Open the Permission Settings Modal
Click the Permission Settings button.
Step 4: Configure Permission Checkboxes
Select or deselect the required permissions:
- device: Device management access.
- infra: Infrastructure management access.
- service: Service management access.
- backup: Backup management access.
- database: Database management access.
- audit: Audit log access.
- vpn: VPN management access.
- user: User/permission management access.
Step 5: Save
Click the Save button. A permission change completion message appears.
Managing Roles [Manager]
How to create new roles or modify existing ones.
Permission Notice: This feature is available to Managers only.
Step 1: Navigate to the Role Management Tab
Click the Role Management tab on the [Permission Management] page.
Step 2: Create a New Role or Edit an Existing One
Click the Add Role button to create a new role, or click an existing role to edit it.
Step 3: Enter Role Information
Enter the role information:
- Role name: A name to identify the role.
- Description: A description of the role.
- Default permissions: Select the permissions to be included in this role by default.
Step 4: Configure Default Permissions
Select the default permissions to be included in this role. Additional permissions can also be granted to individual users.
Step 5: Save
Click the Save button.
Managing Users by Organization
How to separate and manage users across multiple organizations.
Step 1: Navigate to the Organization Management Page
Click [Organization Management] in the left menu.
Step 2: Register an Organization
Click the Register Organization button and enter the organization information:
- Organization name: The name of the organization.
- Organization code: A unique code to identify the organization.
- Description: A description of the organization.
Step 3: Assign Users to an Organization
Edit a user in [User Management] to select their organization.
Step 4: Restrict Resource Access by Organization (Optional)
You can restrict which clusters or services are accessible per organization.
Deactivating/Deleting a User
How to deactivate an account for a departed employee.
Permission Notice: This feature is available to Managers. If you cannot access this feature, please request permission from your organization manager.
Step 1: Navigate to the User Management Page
Click [User Management] in the left menu.
Step 2: Select a User
Select the user to deactivate from the user list.
Step 3: Choose Deactivate or Delete
Select an action:
- Deactivate: Blocks login but retains data. Can be restored later.
- Delete: Permanently deletes the account. Cannot be undone.
Step 4: Execute Deactivation
Click the Deactivate button. Click Confirm in the confirmation dialog.
Step 5: Verify Status
Verify that the user's status has changed to "Inactive".
Updating My Profile and Password
How to edit your own account information.
Step 1: Navigate to the Profile Page
Click the profile icon in the top right and select My Info.
Step 2: Edit Profile Information
Editable fields:
- Name: Change your display name.
- Contact: Enter your phone number.
- Profile image: Change your profile photo.
Step 3: Change Password
Click the Change Password button and enter the following:
- Current password: Enter your existing password.
- New password: Enter the password to change to.
- Confirm password: Re-enter the new password.
Step 4: Save
Click the Save button. A change completion message appears.
Frequently Asked Questions
Invitation email is not arriving
- Blocked by spam filter: Check the spam/junk folder.
- Incorrect email address: Verify the email address and resend the invitation.
- Corporate email policy: Contact IT to whitelist KIWI emails.
- Invitation expired: Ask the administrator to resend the invitation.
I see an "Insufficient permissions" message
This means you don't have the required permission for the action. Ask your administrator to grant the necessary permissions on the [Permission Management] page.
The error message usually indicates which permission is needed. For example, "service permission required" means you need the service permission.
I forgot my password
Use the Forgot Password feature on the login page. A password reset link will be sent to your email.
My account is locked
Accounts may be locked after multiple failed login attempts. Ask your administrator to unlock the account in [User Management].
Related Guides
- Audit Log - View user activity records.
- VPN Settings - Configure VPN access by permission.